Métis 2 Bobber Build

Primary drive arrived this afternoon (y)
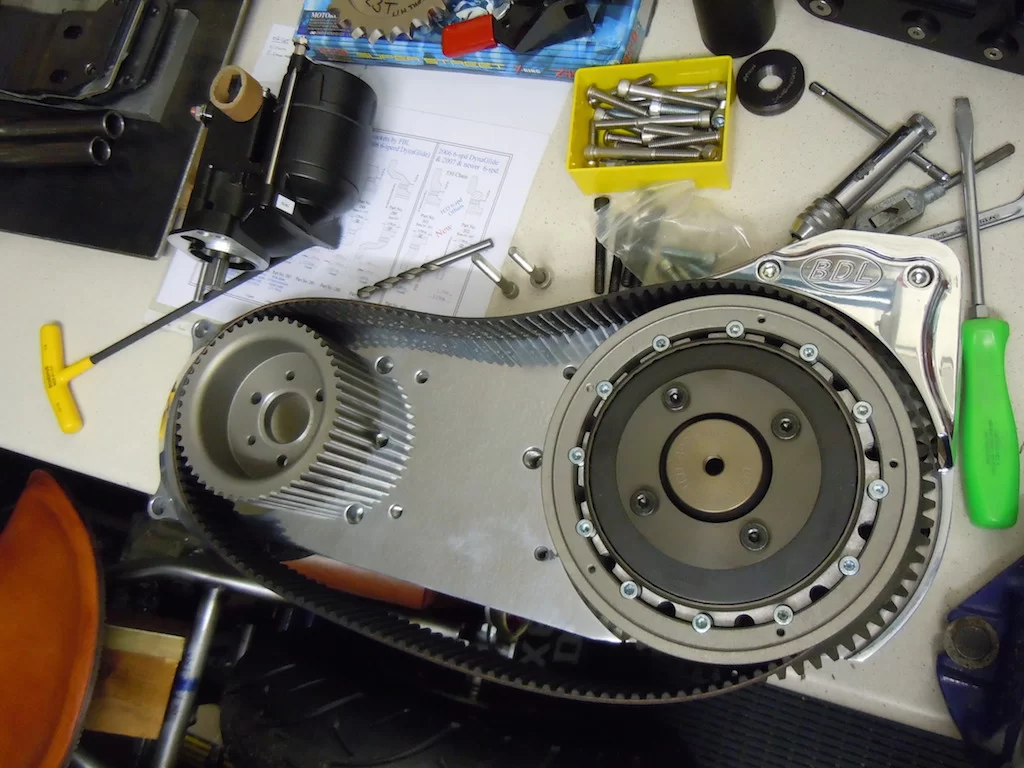
Had a go at getting the gearbox pulley off today, bit of blowlamp heat & an impact gun, but it was having none of it !(n) I knew it would be tight & a L/H thread so I gave up before I broke something. I'll have another go one day. I seem to remember the last one took me a few attempts to get the nut off !!;) "Slowly, slowly, catch a monkey" ............ as they say !
:ROFLMAO:
DSCN4323.webp

One of the locating dowls is very tight too so I will have a look at releiving the corresponding hole ever so slightly tomorrow.
 
I realised the other day that I had a bit of an issue with my modified paddock stand. There wasn't enough clearance on the right-hand side for the paddock stand without fouling the rear brake torque arm bolt head where it attaches to the rear caliper carrier.
DSCN4339.webp

The left-hand side was fine with clearance between the stand adaptor & sprocket/chain. I did turn the countersunk screw round though to (a) give a little bit more clearance & (b) look the same as the other side !
DSCN4337.webp

I ended up making a new, slightly thinner delrin adaptor & mounting it on the inside face of the paddock stand leg, instead in the middle of the leg, like on the other side. Had to make a spacer to fit between the two inner sides of the leg too so as to provide some stiffness & make it look better.
DSCN4340.webp

All seems to fit now, or it will when I've machined the frame brackets down in thickness from 10mm to 8mm. Other than that the stand is now ready for final cutting & re-welding together & re-attaching the handle brackets.
DSCN4343.webp
 
Looking quite good Cat

I don't know if I've asked before? You've already built one before and then this one with a different twist. Are these just for you or is it a customer build?
 
Had a bit of garage time today, dry & sunny outside, but cold when out of the sun !!
First job was to get the belt pulley off the gearbox so I can see what sprocket I need to align the rear wheel sprocket & gearbox up.
These pulley/sprocket nuts are notouriously tight, loctited & a bugger to get off. I know this from experience with the first bike I built. I'd tried with heat/blow tourch, breaker bars & extended tube bars, eventually it gave in, but it wasn't easy.
With that in mind I'd ordered an impact gun, but the supplier failed to produce the goods after weeks of waiting. I got a refund from them & ordered the same gun from another supplier that I'd used previously, (FFX in Dover (y), excellent service) & it arrived two days later. It's a beast of a thing, Millwaulkee 3/4" drive & had said nut off within seconds of pulling the trigger. Life is so easy with the correct tools & even if I never use it again it was worth it ;)
DSCN4509.webp

I've just put a spare sprocket on that I had just to get a measurement to start from. I may well have a gearbox mounting plate made with the exact off-set I need rather than use a combination of "standard fit" sprocket/mounting plates.
DSCN4510.webp

The next job was to fit the paddock stand mounts. The right-hand mount needed some spacers making & a bit of a re-think compared to the left-hand side, below.
DSCN4501.webp

Because of clearance issues with the rear brake torque mounting bolt I had to re-position the plastic bobbin to the inside of the paddock stand.
DSCN4503.webp

Spacers fitted between the paddock stand mount & frame.
DSCN4505.webp

Once the leather saddlebag is re-fitted you see very little of the set-up so it shouldn't really be an issue.
Finally, I removed the "welding spacers" I'd made for the fuel tanks to allow in-place welding of the tank mounts. The rubber grommets, brass spacers & countersunk screws are now fitted. I've just got to cut the inter-tank link pipe to length & crimp the elbow fitting in place.
DSCN4499.webp

DSCN4496.webp

Hopefully I can fit the electrics box inbetween the two tanks, mounted on a suitable bracket. A friend of mine is building a very special Ducati custom build & has bought a MotoGadget unit for his build so I'll have a look at his & see if it will fit in my bike.
DSCN4491.webp

Next job will be to try & get the paddock stand itself recut to suit my bike & re-welded. As the bike has no side stand fitted yet a working paddock stand will make life a lot easier.

 
Had a bit of garage time today, dry & sunny outside, but cold when out of the sun !!
First job was to get the belt pulley off the gearbox so I can see what sprocket I need to align the rear wheel sprocket & gearbox up.
These pulley/sprocket nuts are notouriously tight, loctited & a bugger to get off. I know this from experience with the first bike I built. I'd tried with heat/blow tourch, breaker bars & extended tube bars, eventually it gave in, but it wasn't easy.
With that in mind I'd ordered an impact gun, but the supplier failed to produce the goods after weeks of waiting. I got a refund from them & ordered the same gun from another supplier that I'd used previously, (FFX in Dover (y), excellent service) & it arrived two days later. It's a beast of a thing, Millwaulkee 3/4" drive & had said nut off within seconds of pulling the trigger. Life is so easy with the correct tools & even if I never use it again it was worth it ;)
View attachment 45060
I've just put a spare sprocket on that I had just to get a measurement to start from. I may well have a gearbox mounting plate made with the exact off-set I need rather than use a combination of "standard fit" sprocket/mounting plates.
View attachment 45061
The next job was to fit the paddock stand mounts. The right-hand mount needed some spacers making & a bit of a re-think compared to the left-hand side, below.
View attachment 45062
Because of clearance issues with the rear brake torque mounting bolt I had to re-position the plastic bobbin to the inside of the paddock stand.
View attachment 45063
Spacers fitted between the paddock stand mount & frame.
View attachment 45064
Once the leather saddlebag is re-fitted you see very little of the set-up so it shouldn't really be an issue.
Finally, I removed the "welding spacers" I'd made for the fuel tanks to allow in-place welding of the tank mounts. The rubber grommets, brass spacers & countersunk screws are now fitted. I've just got to cut the inter-tank link pipe to length & crimp the elbow fitting in place.
View attachment 45065
View attachment 45067
Hopefully I can fit the electrics box inbetween the two tanks, mounted on a suitable bracket. A friend of mine is building a very special Ducati custom build & has bought a MotoGadget unit for his build so I'll have a look at his & see if it will fit in my bike.
View attachment 45068
Next job will be to try & get the paddock stand itself recut to suit my bike & re-welded. As the bike has no side stand fitted yet a working paddock stand will make life a lot easier.
Lovely work chief, now you have your rattle gun, you'll find more uses for it, believe me. 👀 (y) 😊

You'll be buying impact reducers 3/4 to 1/2, 1/2 to 3/8 and then down to 1/4. :p :D
 
I'm sure if I put either a 3/8" or 1/4" reducer on that gun it'd rip the square drive off instantly !! 😂

I was thinking it'll be great for getting wheel nuts off as well on the car/van. Not sure I'll use it to put them back on though, but for stubborn nuts/bolts, they won't stand a chance !
 
Bit more garage time today.
Got the link pipe made up for the fuel tanks.
DSCN4521.webp

Measured up the gearbox & rear wheel sprockets for alignment to see what combination of gearbox sprocket/gearbox mount I might need. Turns out the gearbox sprocket I had left over from the previous build will be perfect, that had 0.75" off-set & a zero off-set gearbox mount made the two sprockets out of alignment by 5mm. So, I can just get a new gearbox mounting plate made up to the 5mm off-set & that should be perfect.
DSCN4522.webp

Finally turned up the parts to make the rear exhaust mount. Hopefully I'll finish them tomorrow, make a welding jig & at least get them tacked up to check before final welding.
 
Got the cardboard out today, trying to come up with a suitable bracket to mount the horn & headlight to. It doesn't need to look brilliant as I will be getting some sort of a cover made to cover it all up, but it needs to be strong enough to support the weight of both the horn & headlight.
Going to use 3mm CR4 steel sheet. Got the basic size/shape sorted, but need to give a bit more thought to the angle it will mount at to make sure I can get the headlight to the correct angle so I don't end up dazzeling on comers at night !!
DSCN4576.webp

DSCN4580.webp

I've currently got a replica 1940's Indian Four headlight mount, but I'm not sure I can get it to work with the headlight shell I have. Might have to go with a different type of mount & a LED headlight.
 
Can't decide whether to go for an 80mm diameter speedo or a 120mm diameter version, like the old Vincent 5" jobbie.
Anybody got any useful opinions ?
This is the 80mm option,
DSCN4584.webp

DSCN4587.webp

And this is the 120mm version.
DSCN4585.webp

DSCN4586.webp
 
If your eyesight can take it, I say the smaller one. What did you do on the other build when it came to the speedo?
 
If your eyesight can take it, I say the smaller one. What did you do on the other build when it came to the speedo?
I used a small Dakota Digital speedo on the first bike. I can read the speed easy enough, but I struggle to see the odometer because the numbers are so small. I need to keep an eye on it too because of the limited tank range of that bike, after 50 or so miles I NEED to be looking for fuel.

This new bike has a bigger fuel capacity, potentially 14 litres compared to the 9 litres of the first bike, so that shouldn't be an issue with this one & I prefer to idea of an old style speedo with a mechanical needle that physically moves ! ;)
DSCN0506.webp
 
I used a small Dakota Digital speedo on the first bike. I can read the speed easy enough, but I struggle to see the odometer because the numbers are so small. I need to keep an eye on it too because of the limited tank range of that bike, after 50 or so miles I NEED to be looking for fuel.

This new bike has a bigger fuel capacity, potentially 14 litres compared to the 9 litres of the first bike, so that shouldn't be an issue with this one & I prefer to idea of an old style speedo with a mechanical needle that physically moves ! ;)
View attachment 48941

I have none of your skills or finesse so I'm sure it will look great what ever you do chap.

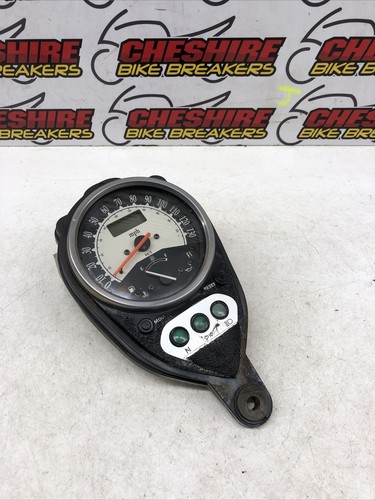
I did see something today that was fitted as standard to a kawasaki VN900 that has an analogue speedo with a digital fuel gauge and options to run other things from a menu, this ones condition and price are silly but it's another option

Image 41 - ♻️ Kawasaki Vn 900 C9f A Custom 2007 - 2016 Speedo Clocks ♻️


Back
Top Bottom