
You are using an out of date browser. It may not display this or other websites correctly.
You should upgrade or use an alternative browser.
You should upgrade or use an alternative browser.
Métis 2 Bobber Build
- Thread starter CAT3
- Start date


Exi, if you're looking at the bolt lengths, (they are actually termed screws, but I'll forgive you for not knowing that !) in the picture above there should be four complete threads protruding the nut/insert/etc for the screw/bolt to be in safety, (according to my experience in the aircraft industry). Once the headstock cover, which is still to be made, is fitted it should make the screw lengths correct. 
Also, please remember what will be powering this lump, a big V-twin & the longer the tail of the screw/bolt is the longer it will stay where it is without falling out !!
Also, please remember what will be powering this lump, a big V-twin & the longer the tail of the screw/bolt is the longer it will stay where it is without falling out !!

You'll have to forgive Ex, he's new to this.Exi, if you're looking at the bolt lengths, (they are actually termed screws, but I'll forgive you for not knowing that !) in the picture above there should be four complete threads protruding the nut/insert/etc for the screw/bolt to be in safety, (according to my experience in the aircraft industry). Once the headstock cover, which is still to be made, is fitted it should make the screw lengths correct.
Also, please remember what will be powering this lump, a big V-twin & the longer the tail of the screw/bolt is the longer it will stay where it is without falling out !!
Or at least he was new, twenty years ago when he started his build.
I ran the bike a while un-painted for a while as I checked it out in case it needed any brackets, etc welding. I went up to see the guy who made the original fuel tank & mudguard & he asking what colour I was going to have it painted & whether it would have "Harley Davidson" on the tank.Probably been asked, how did the name Metis pop up?
There are only a couple of genuine HD parts on it so I really didn't want HD on the tank although as I couldn't think of something I most probably would end up going that route. As quick as a flash he suggested the "Métis" name as an option. "Where on earth have you plucked that name from" I asked. Somewhere in his wife's side of the family there is Métis blood.
The Métis people are a North American First Nations tribe, born out of a mixture of white trappers & indigenous Indians, mainly Cree I believe. So, they are mixed blood & they believe they will last forever. The official flag of the Métis people is the blue background with a white infinity symbol in the centre, (there is a red version too & it is said). The colour denotes who the trapper traded his fur pelts to, blue to the Hudson Bay Company & the red to the North West Company.
It's the "mixed blood" aspect I liked, my bike had a mixture of old style, more modern parts & up-to-date materials & machining mixed together & I thought the name was perfect for what I was building.
Hopefully anybody reading this who has Métis blood in them is not offended


Are they also screws where you got your inspiration for your chain guard bracket?Exi, if you're looking at the bolt lengths, (they are actually termed screws, but I'll forgive you for not knowing that !) in the picture above there should be four complete threads protruding the nut/insert/etc for the screw/bolt to be in safety, (according to my experience in the aircraft industry). Once the headstock cover, which is still to be made, is fitted it should make the screw lengths correct.
Also, please remember what will be powering this lump, a big V-twin & the longer the tail of the screw/bolt is the longer it will stay where it is without falling out !!
 And you mean that bit isn't finished yet either
  crack on...
Oh, and they are Machine Screws if you are using the correct terminology
 but in your application it is a bolt...
BTW, what make clips did you use when you copied me, you didn't say? You could have used stainless

Aircraft Industry you say

Last edited:
You'll have to forgive Ex, he's new to this.
Or at least he was new, twenty years ago when he started his build.
28 years ago actually - the bike took me about a year from start to finish

28 years in total?
I hate to ask but you have some funny ideas about the passage of time.

What mKe of bike is that? Can't quite make out the little writing on the tank, Subtle as it is
It's a KawasakiWhat mKe of bike is that? Can't quite make out the little writing on the tank, Subtle as it is

Ah. That explains why you’re taking so long with the latest build

You had to ask didn’t you.Probably been asked, how did the name Metis pop up?

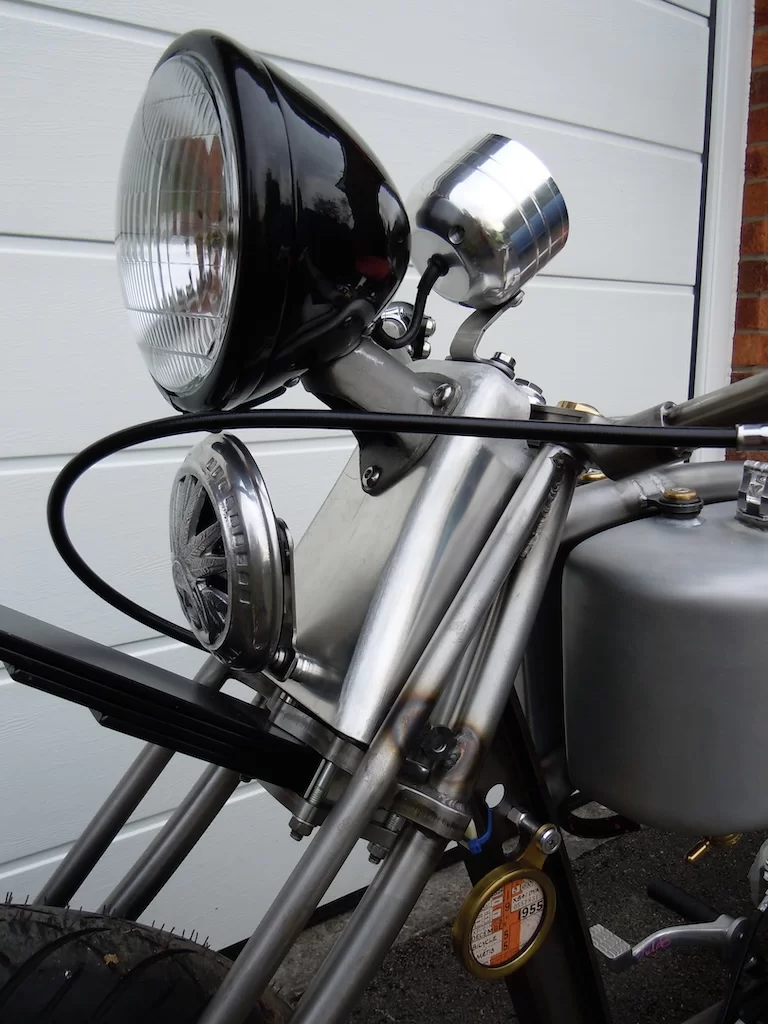
The bike is ready for collecting now the rear mudguard, battery cover & head-stock cover have been made by MCS in Brightlingsea.
Sorry about the shit brackets Exi for the speedo & horn !
View attachment 87929
View attachment 87930
What's that in the middle of the first picture and did you take a mould from AC's wiener as a model
Went to MCS today to collect my bike after having the rear mudguard, battery cover & Headstock cover made.

The blue of the paddock stand is the blue the frame will be with a lighter blue for the leaf spring operating arm.
I really need a bigger garage !!
The blue of the paddock stand is the blue the frame will be with a lighter blue for the leaf spring operating arm.
I really need a bigger garage !!
Last edited:

No MSC this timeYou used MCS on the last one as well ?
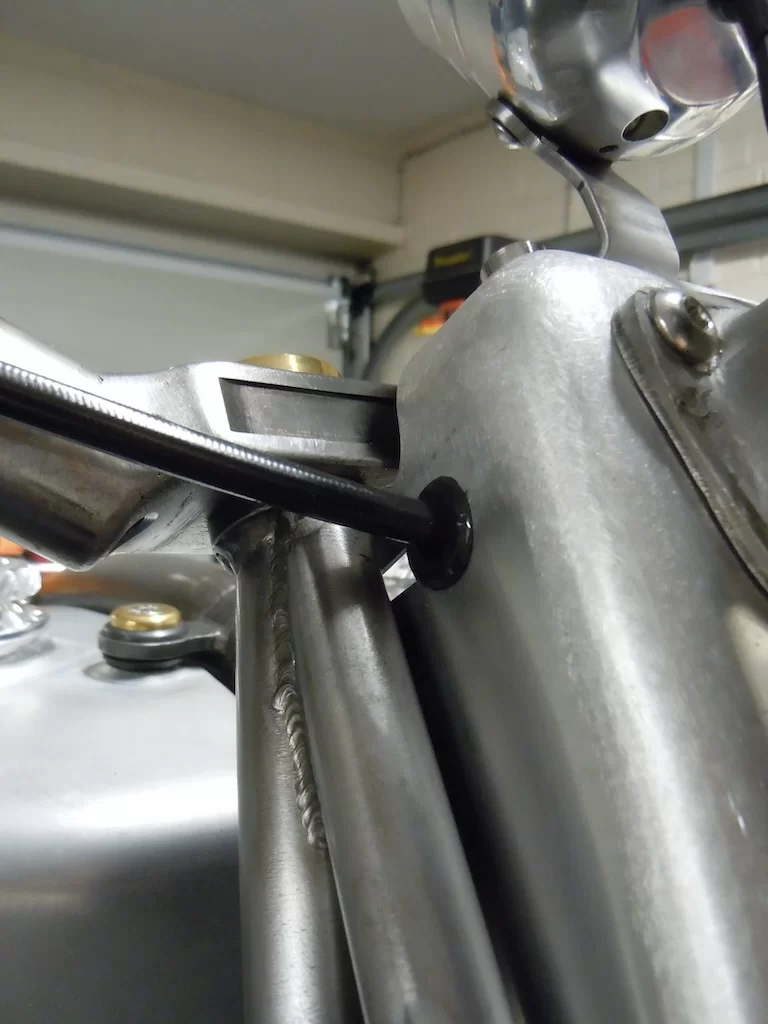
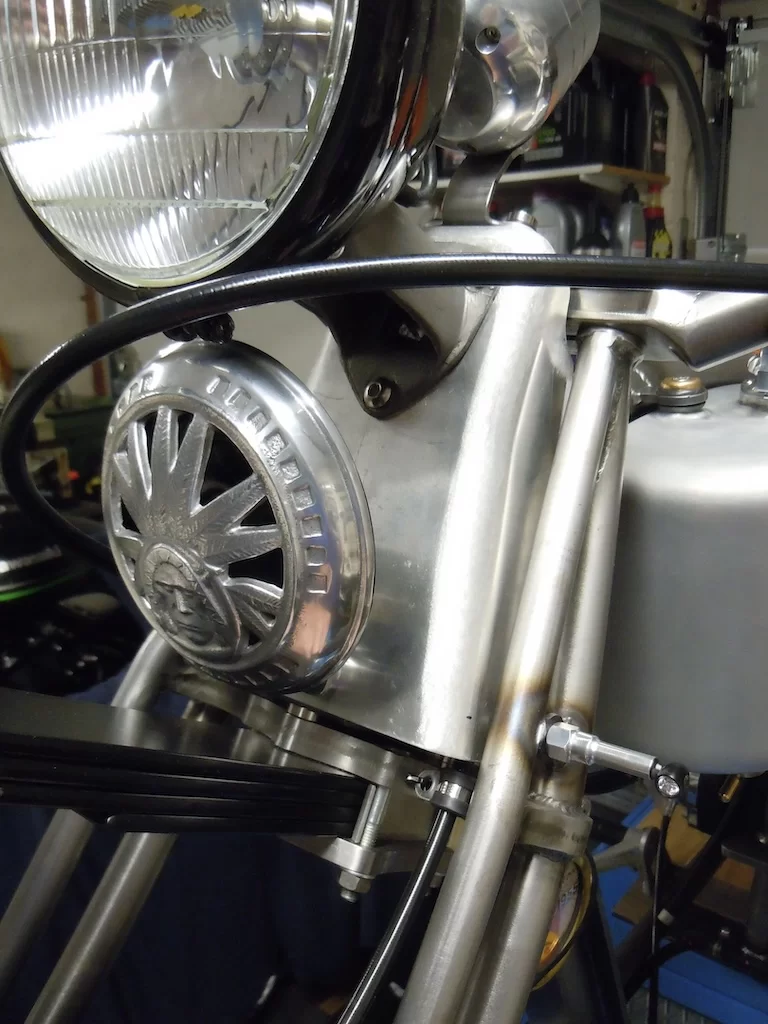
After getting the sheetmetal work back the other day I did a bit of fettling tonight to get some grommet holes drilled & slots cut in the headstock cover to allow the clutch cable, brake hose & certain wiring to route correctly.
Started by opening up the wiring hole in the support bracket & putting a bigger grommet in that. This grommet is hidden by the headlight mounting bracket & it's better to be a bit bigger than it needs to rather than too small. This grommet is double the size of the original.
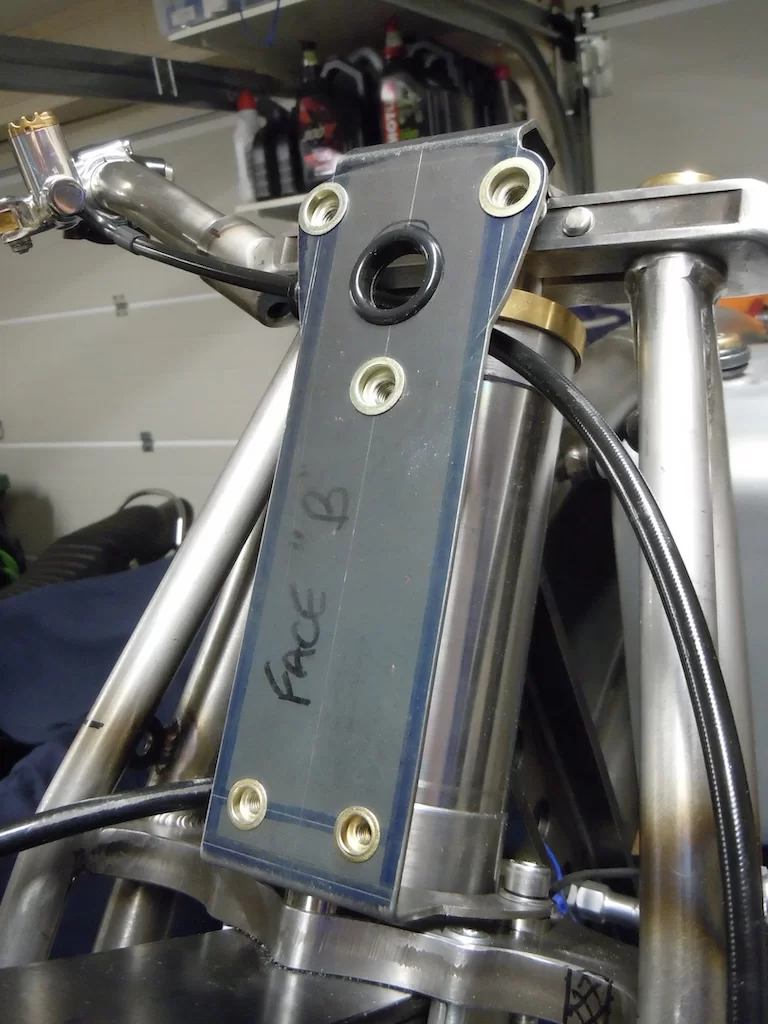
Next was the faffing about mounting the cover & marking where the holes needed to be for the clutch cable, brake hose & both front indicators.

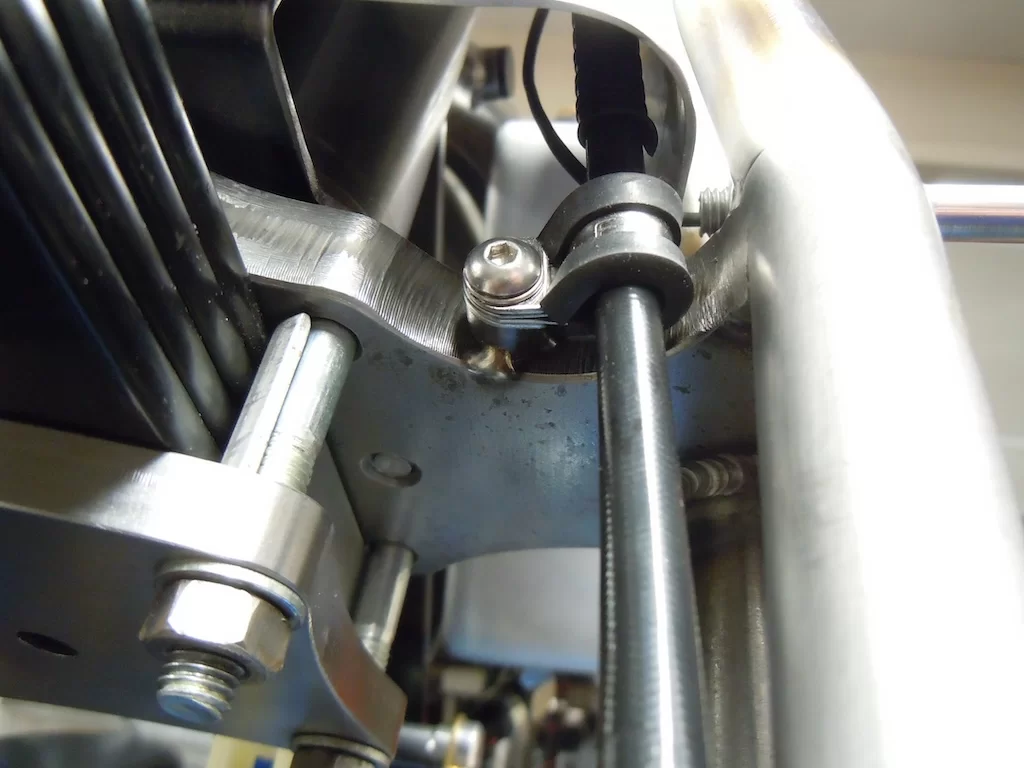
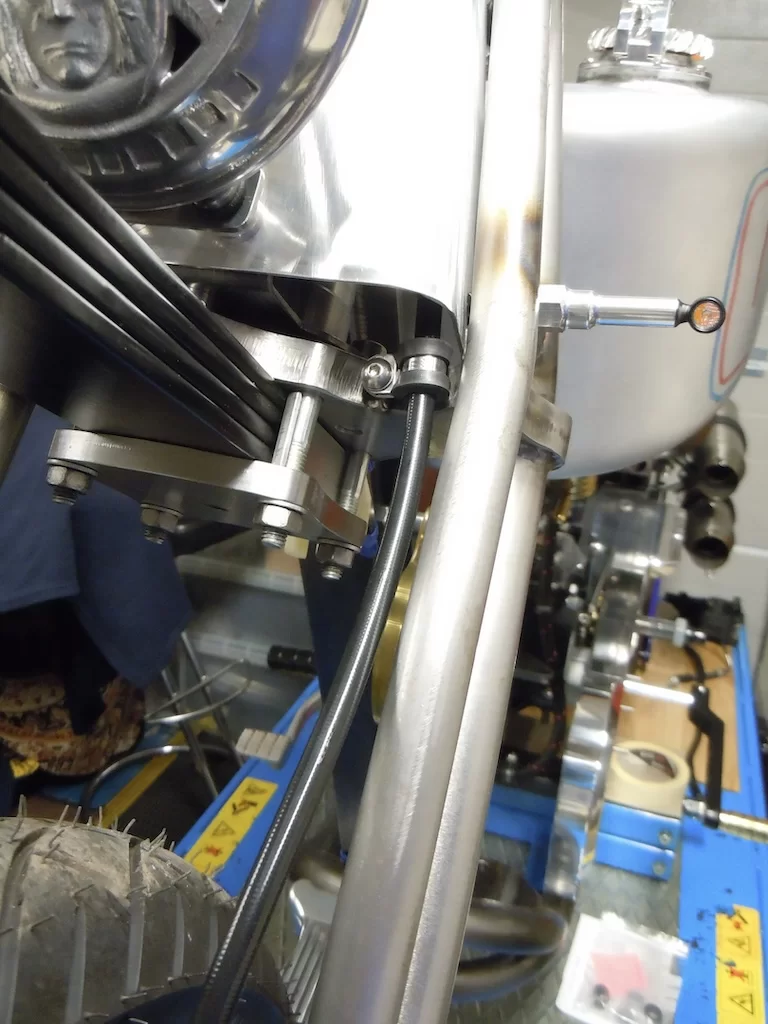
Next was working out where a P-clip needed to mount to hold the brake hose at the lower yoke. I just need to make a small spacer now to weld to the yoke & then tap the hole M5. I'll pre-drill the spacer on the lathe that way it will act as a drilling guide to make the hole deep enough once the spacer is welded to the yoke.

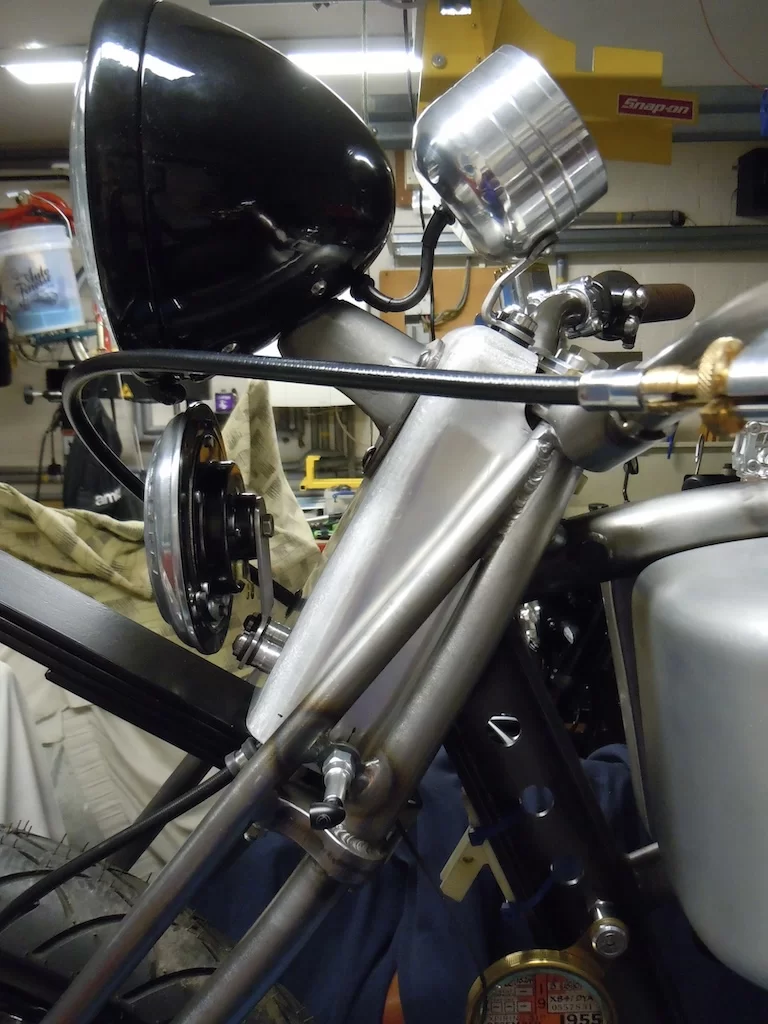
Started by opening up the wiring hole in the support bracket & putting a bigger grommet in that. This grommet is hidden by the headlight mounting bracket & it's better to be a bit bigger than it needs to rather than too small. This grommet is double the size of the original.
Next was the faffing about mounting the cover & marking where the holes needed to be for the clutch cable, brake hose & both front indicators.
Next was working out where a P-clip needed to mount to hold the brake hose at the lower yoke. I just need to make a small spacer now to weld to the yoke & then tap the hole M5. I'll pre-drill the spacer on the lathe that way it will act as a drilling guide to make the hole deep enough once the spacer is welded to the yoke.
I got the front brake hose clamp sorted today. Machined up a small spacer to allow the P-clip to sit in a suitable position. I drilled the M5 tapping hole out on the lathe & once it was tacked to the lower yoke, used that to drill the hole deeper & square into the yoke itself. Then tapped the hole so I could mount the P-clip. Once it's final welded in place I'll just run the tap back through it to clear the thread out.
Got the rear mudguard mounts machined up today. It's always amazes me how quick a day can fly by just making six simple bits. I'd already had the sheet metal parts laser cut a few years ago when I was doing the same job on the other bike so that saved some time this time round.
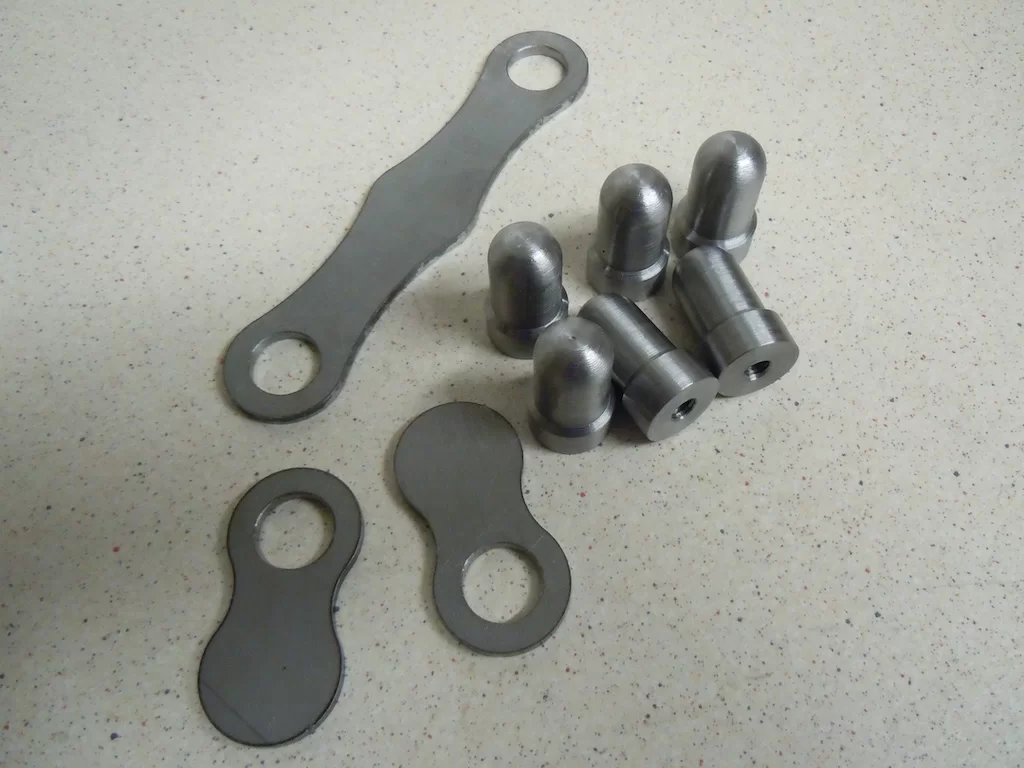
I'll tack the sheet metal assemblies up tomorrow & then I need to find some suitable grommets before I machine up the stainless steel spacers that will be needed to prevent the grommets from being crushed when the bolts are tightened up.
The long mount will go at the bottom of the front of the mudguard, the two single assemblies will hold the middle of the mudguard & the two single mounts will go at the rear of the mudguard, attaching to the frame via two pieces of steel tube. The rear indicators will also mount to these two tubes & their wires will hide inside the tubes.
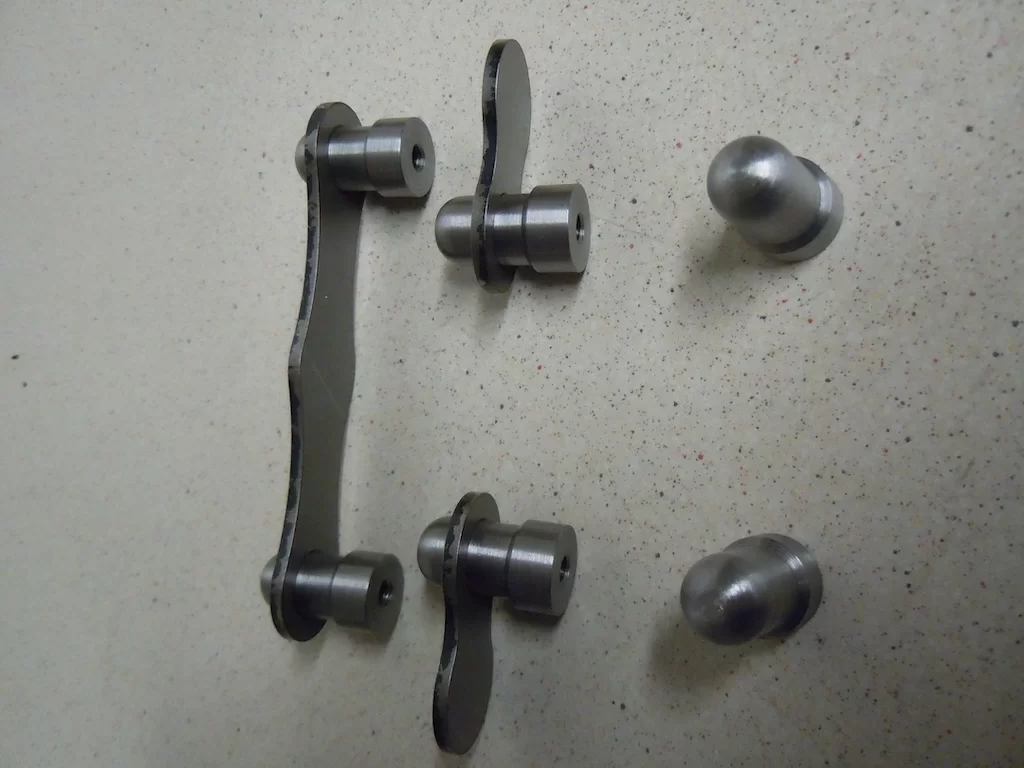
I'll tack the sheet metal assemblies up tomorrow & then I need to find some suitable grommets before I machine up the stainless steel spacers that will be needed to prevent the grommets from being crushed when the bolts are tightened up.
The long mount will go at the bottom of the front of the mudguard, the two single assemblies will hold the middle of the mudguard & the two single mounts will go at the rear of the mudguard, attaching to the frame via two pieces of steel tube. The rear indicators will also mount to these two tubes & their wires will hide inside the tubes.
I've got the mudguard mounts tacked up now.
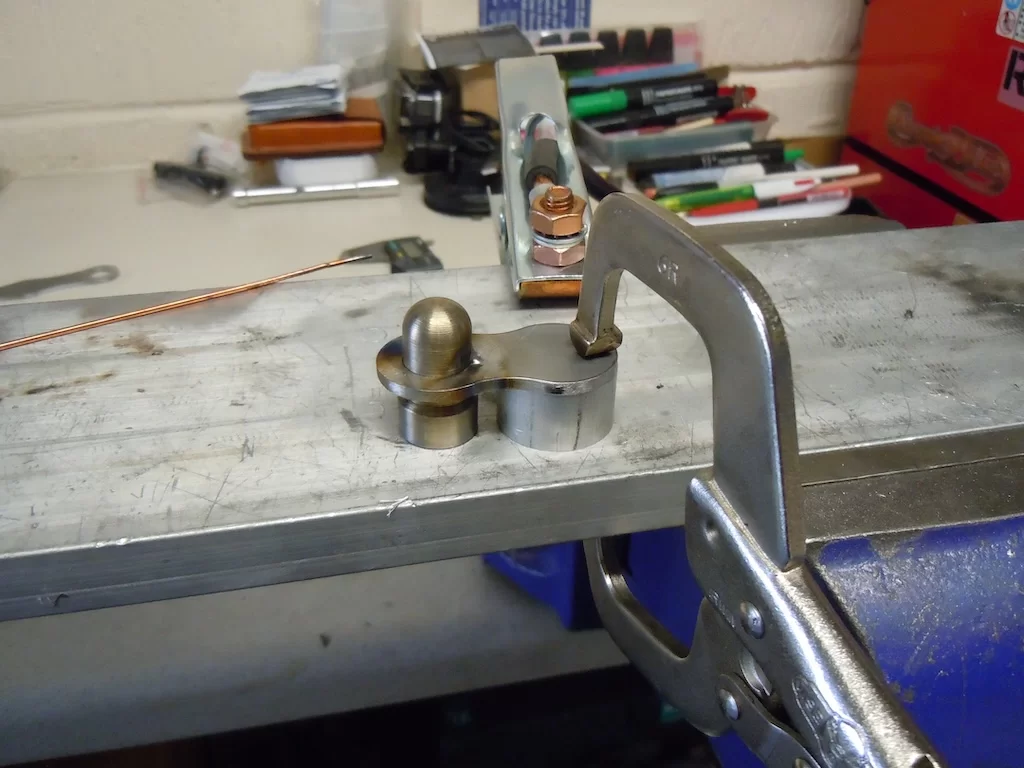
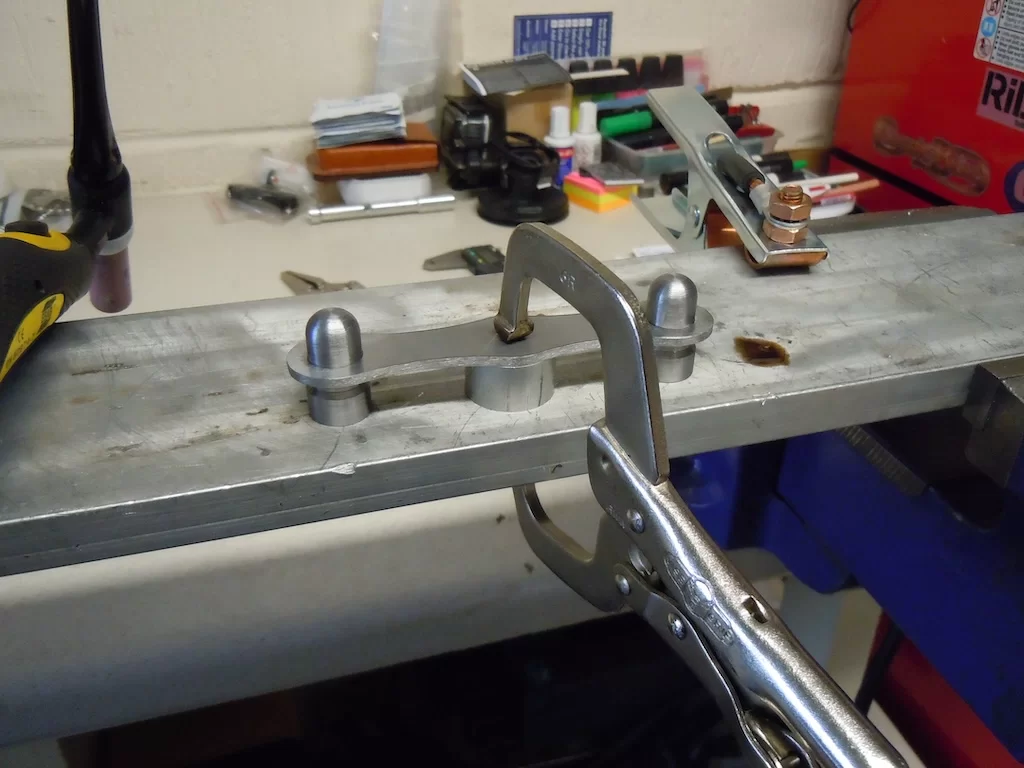
Then a quick waz over with the wire brush,
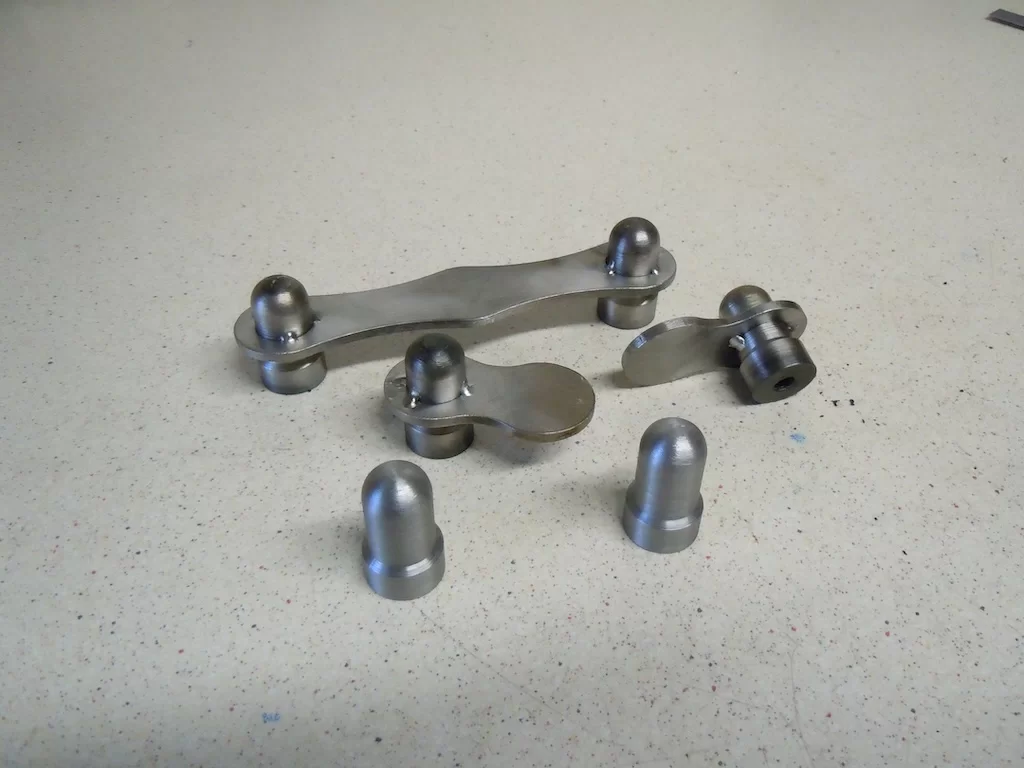
I need some suitable tube now & get it bent up to suit my needs.
Also drilled the mudguard for the two rear mounts, the holes are just 6mm at the moment to allow for slight adjustments, if needed !
Once I got some suitable grommets & the mudguard is mounted, I'll open out the holes to suit them.
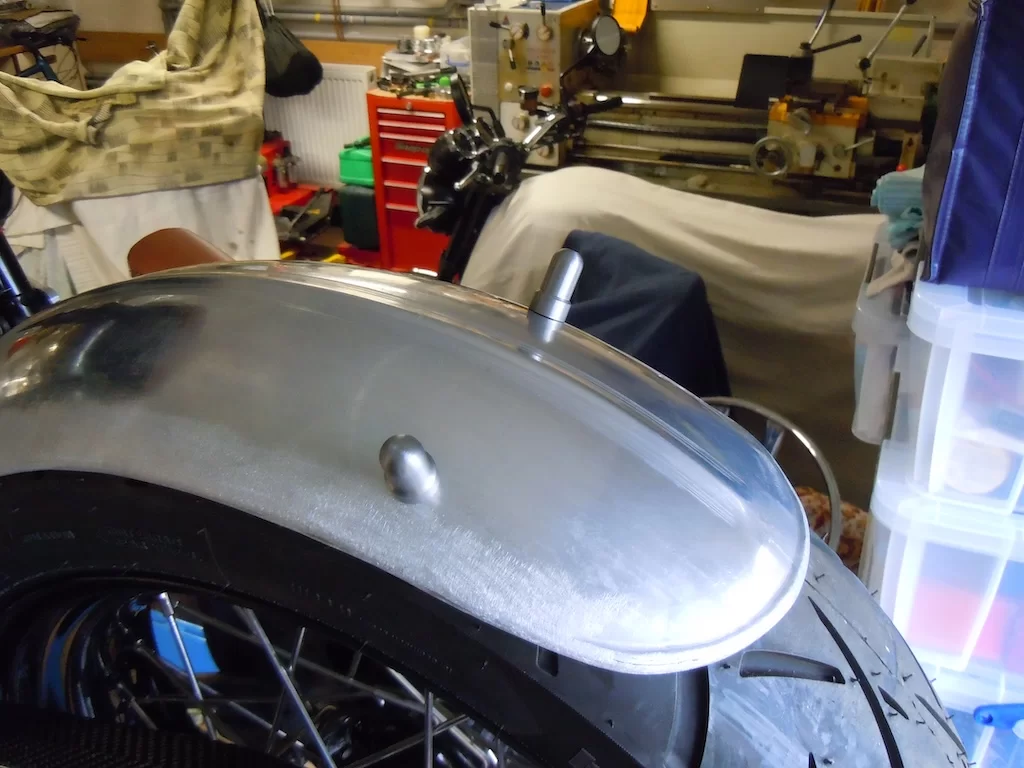
Then a quick waz over with the wire brush,
I need some suitable tube now & get it bent up to suit my needs.
Also drilled the mudguard for the two rear mounts, the holes are just 6mm at the moment to allow for slight adjustments, if needed !
Once I got some suitable grommets & the mudguard is mounted, I'll open out the holes to suit them.

Wonderful work chief, I have workshop envy 
Got a bit more machining done today.
Started off with the steering damper spacer. Once finished this will be welded to the bottom leaf spring clamping plate, on the front forks. It just needs a section cutting out to allow the operating arm to rotate left & right & the two mounting holes drilling & tapping. I then just need to machine up a spacer to hold it central while I get it tacked in place, ready for final welding.
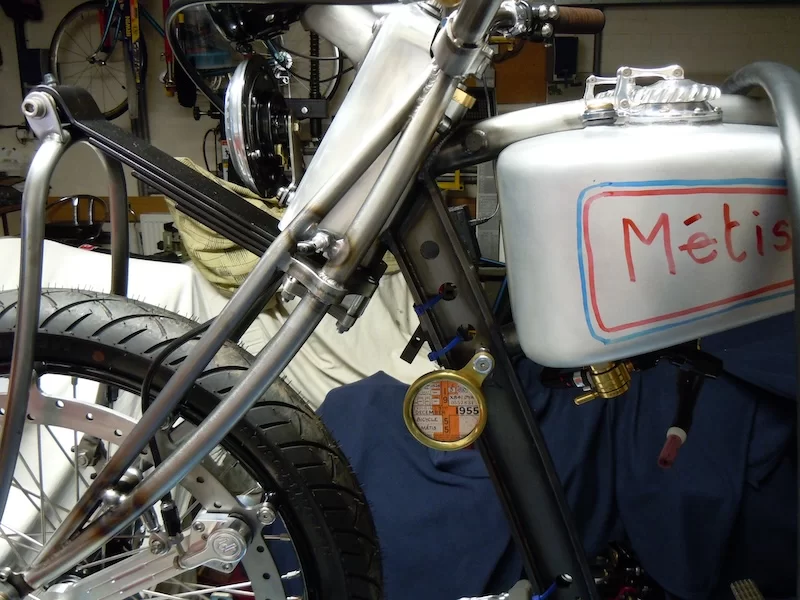
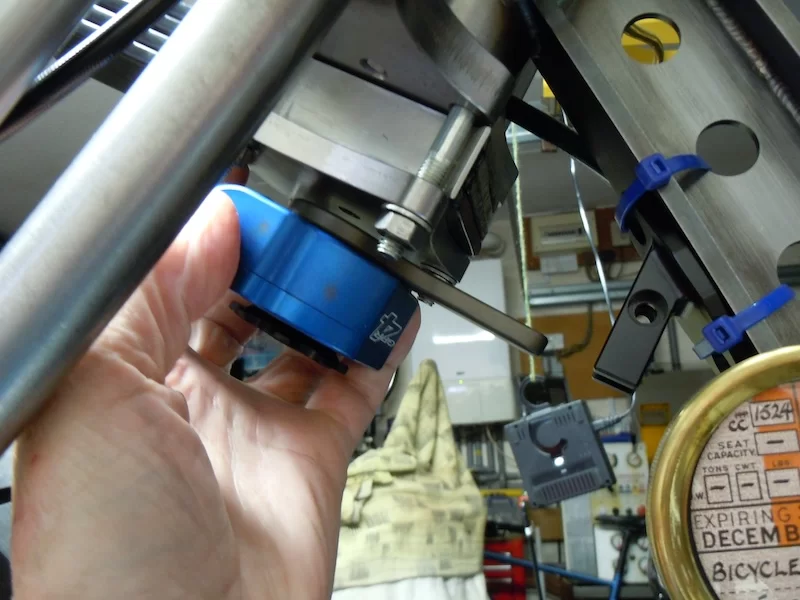
Basically, the picture above shows where it will sit, but the operating arm needs replacing with a longer one so it will reach the mount on the frame. At the moment the mount is just held in place with a couple of blue traps. I could space the mount off the frame down tube instead of fitting a longer arm, but I don't think it will look as good & we know what Exi is like when he sees a shit bracket !
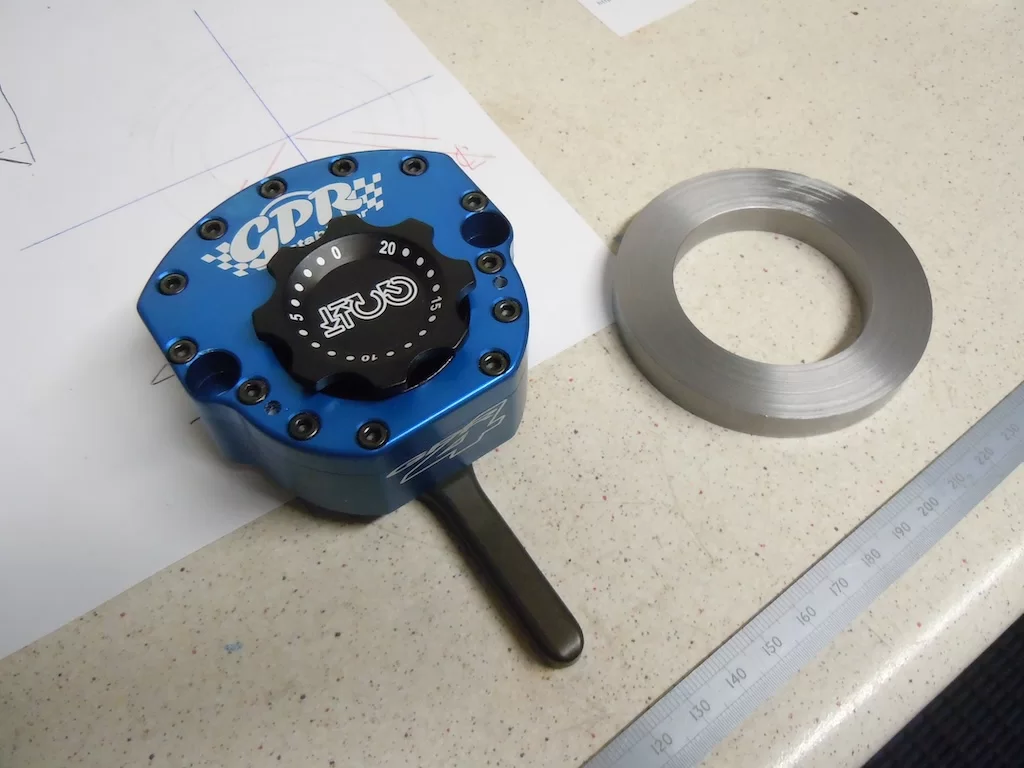
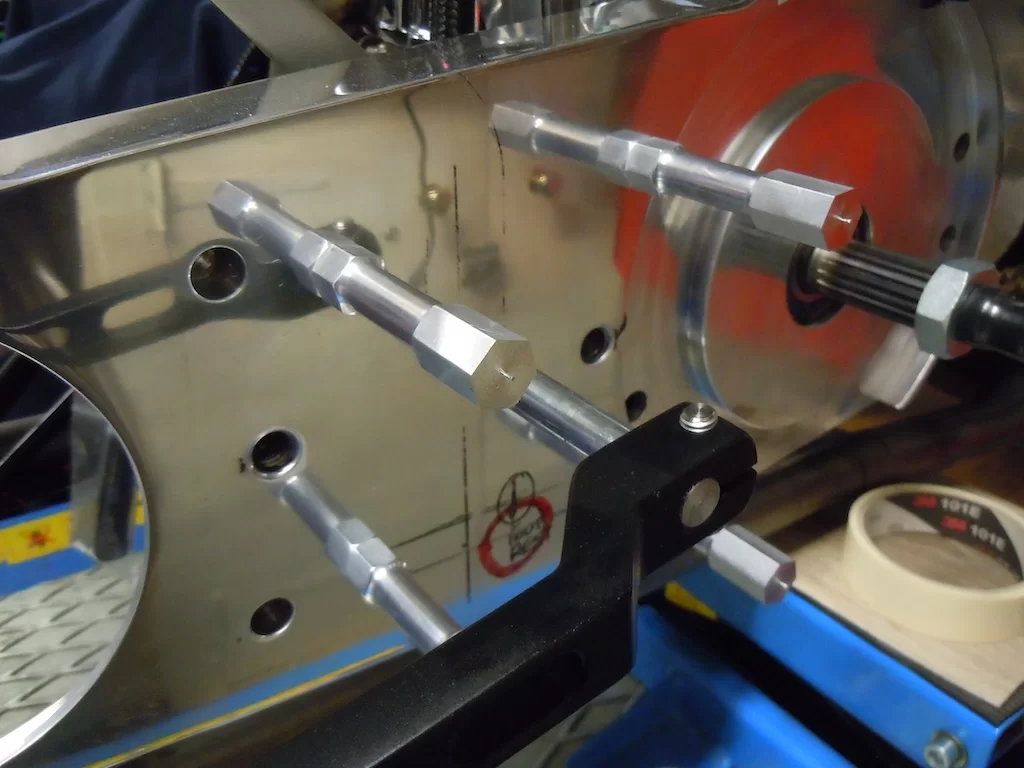
Also, I got most of the primary drive cover spacers made. I've not got the clutch at the moment, (it's with my mate who's doing a CAD drawing of the clutch cover I want so that I can get that machined) so I don't know the final length yet. Once I do & have cut them down I can drill & tap the ends for the cover mounting screws.
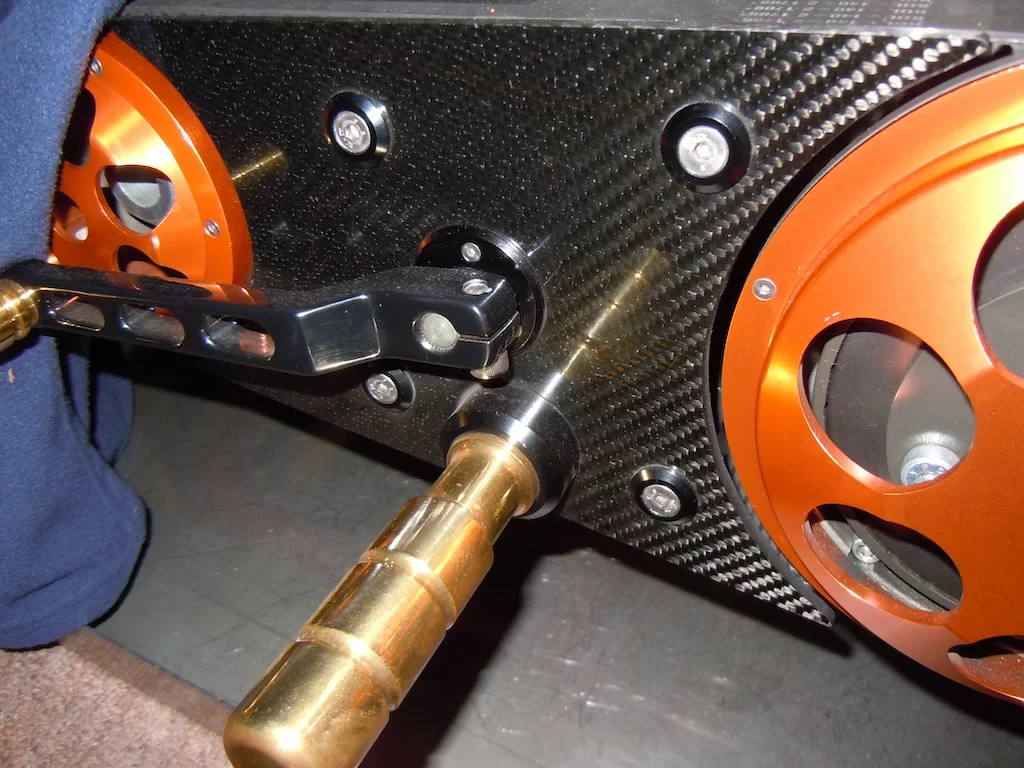
This primary drive cover will also hold the left-hand footrest & the gear change lever bearings so it needs to be fairly robust. The cover itself will be carbon fibre, the same as the other bike, (see bottom picture)..
Started off with the steering damper spacer. Once finished this will be welded to the bottom leaf spring clamping plate, on the front forks. It just needs a section cutting out to allow the operating arm to rotate left & right & the two mounting holes drilling & tapping. I then just need to machine up a spacer to hold it central while I get it tacked in place, ready for final welding.
Basically, the picture above shows where it will sit, but the operating arm needs replacing with a longer one so it will reach the mount on the frame. At the moment the mount is just held in place with a couple of blue traps. I could space the mount off the frame down tube instead of fitting a longer arm, but I don't think it will look as good & we know what Exi is like when he sees a shit bracket !
Also, I got most of the primary drive cover spacers made. I've not got the clutch at the moment, (it's with my mate who's doing a CAD drawing of the clutch cover I want so that I can get that machined) so I don't know the final length yet. Once I do & have cut them down I can drill & tap the ends for the cover mounting screws.
This primary drive cover will also hold the left-hand footrest & the gear change lever bearings so it needs to be fairly robust. The cover itself will be carbon fibre, the same as the other bike, (see bottom picture)..
I could space the mount off the frame down tube instead of fitting a longer arm, but I don't think it will look as good & we know what Exi is like when he sees a shit bracket !
Does it even need a steering damper though
Potentially no, but when I was building the first bike I thought because of the antiquated Springer forks, the 21" disc spinning around & the very wide handle bars it was better to have a steering damper fitted. If it wasn't needed I could always unbolt it or turn it right down. Basically it's still fitted & turned right down to minimum. Were it needed & there wasn't one fitted it would have been a real pain to fit one once the bike was finished.Does it even need a steering damper though
That is the same philosophy for this build. Although I ran the first bike for a while, un-painted, just to check everything was OK & make sure no further welding was necessary.
This new build, although similar, has a leaf spring front end, which I have no experiance of & the steering angle was decided upon more for how the front forks looked in terms of "visually looking" I figured I'd do the same & fit a steering damper. If it doesn't need it, hey-ho.
Excellent, now take it offPotentially no, but when I was building the first bike I thought because of the antiquated Springer forks, the 21" disc spinning around & the very wide handle bars it was better to have a steering damper fitted. If it wasn't needed I could always unbolt it or turn it right down. Basically it's still fitted & turned right down to minimum. Were it needed & there wasn't one fitted it would have been a real pain to fit one once the bike was finished.
That is the same philosophy for this build. Although I ran the first bike for a while, un-painted, just to check everything was OK & make sure no further welding was necessary.
This new build, although similar, has a leaf spring front end, which I have no experiance of & the steering angle was decided upon more for how the front forks looked in terms of "visually looking" I figured I'd do the same & fit a steering damper. If it doesn't need it, hey-ho.
