Eelco's Darmah

Martin, I see you got the flywheel removal conundrum sorted, but if it's any help if you need to do it again, what I do (fairly regularly given I don't have a kick start on the Darmah SS, and it goes through sprag clutches with tedious and expensive regularity) is firstly get a 3 leg puller and grind the jaws down so it leaves a fairly short thin section that fits under the starter gear (you can't get behind the flywheel as you've discovered!). Then tighten a ratchet strap round the 3 legs of the puller so they get held into the fairly tenuous grip they'll have on the gear. Tighten the puller gradually so you've got some tension on it, and then a couple of sharp taps on the end of the puller. You may need to tighten it a couple of more times, and give it a further tap, but it should all fall off with a satisfying clatter!

Cheers,

Kenny.
 
Thanks, Kenny, I like that idea a lot better than hitting it with a hammer!
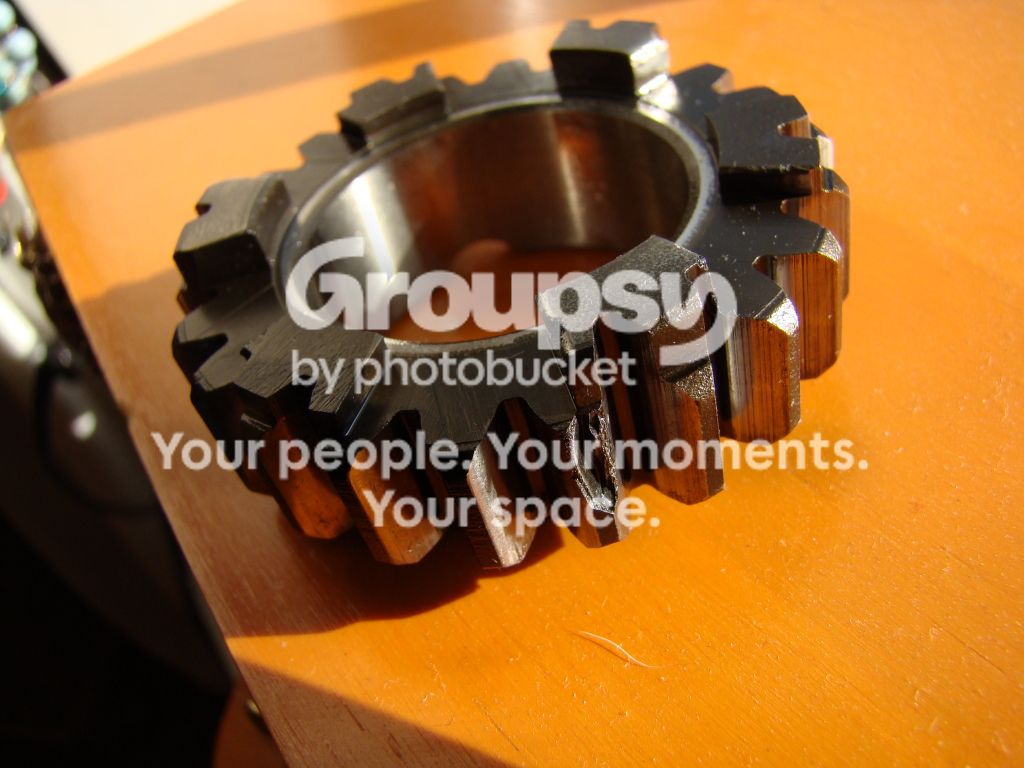
I just looked up the cost of a new 5th gear and was a little taken aback. I think I might have to invoke a rare 'six bottles of real ale' favour from MMT.
5thgearmissingtooth.jpg
 
Last edited:
Managed to find a second-hand gear whilst working in Spain last week so must remember to let Andrew at Mdina that he doesn't need to rummage through his spares pile for me before his holidays.
The husband of a woman I was working with is mates with Sete Gibernau and my taxi driver's wife is best friends with Barbara Mamola!
I tried to visit the old speedbowl at Sitges but it's very private and I got kicked out after only 5 minutes. Phenomenally well-preserved place.
sitgesspeedbowl1.jpg

sitgesspeedbowl2.jpg

sitgesspeedbowl3.jpg
 
I just heard from Goddens that they have split the crank and it needs both rods boring out, hard sleeves fitting, a new crank pin and rollers, which is much cheaper than the option of finding a con-rod set.It would evidently have still run ok but that the rods had moved sideways, wearing the shim almost away. MMT says that he will like to see if the rods are off-centre in the bores at all when we get it all back together. I have to find some work now to pay for the repairs....
 
Since things are a little quiet at the moment, MMT and myself drove down to Santa Pod yesterday for the Dragstalgia event. On the show-card for one of the nostalgic Funny-cars, next to 'driver' and 'crew chief' I saw a great job-title: 'Back-up babe'. This is the young lady who directs the car back to the start line after a burn out and keeps it straight. I asked her if she was the back-up babe had they broken their first one, from which height of wit I unfortunately tumbled at the realisation that she was Dutch and therefore was smiling from politeness and not understanding...
DSC03617.jpg

if anybody else likes old custom cars and dragsters here's a link to all my pictures from the day.

http://s1232.photobucket.com/albums/ff369/cleckheaton/santa pod 2012 dragstalgia/
 
With the cases all but bare, MMT checked out the bearings and suggested he'd be happier if we changed them all, so I found a bearing list on Bevel heads and I'm searching for prices for the correct items. I also spotted what looks like a hairline crack between the main bearing housing and the oil-pump mounting area. I'll put up picures but MMT is of the opinion that it is better left as the repair would maybe cause more distortion and future problems than leaving it alone. He keeps telling me that this isn't a race motor and I just want to get it running and reliable at the speeds my old brain can handle and i know that he is right, but....
 
These are the best prices so far for the 6 or 7 bearings in the cases:

7307 BECBM in FAG at £75.00 x2 (plus vat)

6008 RS1 £8.63 (FAG)

6204 £3.28 (NSK)

6206 £5.11 (FAG)

6204-Z £3.74 (NSK).

I'm going to heat up the cases, drop out the bearings and check that what I have is what it says in the book.
 
Thank you Mr Pict. I owe you that beer.
I just tried to warm up my cases and they won't fit in the oven, even though the COW (contented older woman) is out. I guess that I'll see if MMT has a stud remover as the two-nuts trick won't work. I also tried to take out the threaded bung in the bottom of the case that holds the plastic retainer that the oil-strainer locates in and ended-up drilling-it out and then re-tapping the hole.
 
7 of the studs came out easily with my new stud-extractor, although it chewed-up the surface a bit, so some filing-back and polishing is in order. the other, however, needed large applications of heat and freezer-spray (not at the same time) to break the seal and eventually came loose. Now i have to wait until the coast is clear again before I enter the Mem Sahib's kitchen and defile her Aga. (it's actually a cheap B&Q electric but I can dream). MMT reckons that we need new main bearings to get a correct end-float setting so I'll have to bite the bullet and get cracking to earn some dosh to pay for them. he just rang to invite me to the 10 of the best meeting at Elvington this weekend. Evidently another mate of his from the US is coming over who knows about Megasquirt and may be able to help with starting my recalcitrant trike project.
profile.jpg
 
7 of the studs came out easily with my new stud-extractor, although it chewed-up the surface a bit, so some filing-back and polishing is in order. the other, however, needed large applications of heat and freezer-spray (not at the same time) to break the seal and eventually came loose. Now i have to wait until the coast is clear again before I enter the Mem Sahib's kitchen and defile her Aga. (it's actually a cheap B&Q electric but I can dream). MMT reckons that we need new main bearings to get a correct end-float setting so I'll have to bite the bullet and get cracking to earn some dosh to pay for them. he just rang to invite me to the 10 of the best meeting at Elvington this weekend. Evidently another mate of his from the US is coming over who knows about Megasquirt and may be able to help with starting my recalcitrant trike project.[qimg]http://i1232.photobucket.com/albums/ff369/cleckheaton/profile.jpg[/qimg]

Like the way the mirrors are set up on the trike.
Must be very handy being able to see around the corner at junctions when you are so far behind the front wheel! ;) :)
 
Ha ha! I pushed them around as I kept smacking them as I slid past in my very tight garage. They are only on in case I eventually need to SVA the trike and I have a lovely Maltese Cross mirror to put on after it passes.
Sorry to put in non-Ducati material once again as I try to distract people from realising that I'm getting not very far not very quickly...
 
Here is the 'crack' which MMT has examined and reckons 'doesn't go anywhere' and so can be ignored, especially since I'm not racing etc etc
crack.jpg

There is one bearing in the cases which is blind so MMT made me a blind bearing puller from a rawlbolt and a length of steel pipe scrap. 125 degrees in the oven and a few hefty thwacks later and it's out! We had a back-up plan involving drilling holes through from the back of the bearing into the outer race to give access to a drift and then plugging the holes after (since they will be hidden behind the sprocket) Thankfully that wasn't necessary.
blindbearungpuller.jpg
 
Since I found a lot of play in the rods and the motor is renowned for being a bit lacking in the lubrication department I decided to read-up on possible cures. Kevin's famous article about his race motors in the States suggested that oil needed to get back to the sump compartment quicker from the crankshaft area. he had lots of holes and screens to prevent windage, swinging pick-ups etc etc. I settled for drilling some holes!
oilholes.jpg

He also talked about a set of oil-pump drive gears from Germany which speeded it up and increased flow. I can't find out if those are still made and so called in at Autovalues Engineering in Idle who make Morgo pumps for Triumphs and Ariels. I wanted to know if they'd be interested in making uprated square-case pumps but the lady I spoke to said they only dealt in old bikes! (guess I should be flattered on the Darmah's behalf!) Nevertheless I'll send them some pictures and an email in case they think that there is a market.
The oil pump is not a complicated shape and would be relatively easy for them so long as a pair of their existing gears could be used and they were thicker than the standard Ducati ones. I am also assuming that there would be room for a thicker pump in the cases under the bevel drive gears. Does anybody know if that is the case?
One further advantage of a newly manufactured pump would be that it could have the option of blanking off the outlet hole and arranging a tapping for the Australian full-flow modification. There is a picture on bevelheads of a special pumphousing but that was using standard pump internals.
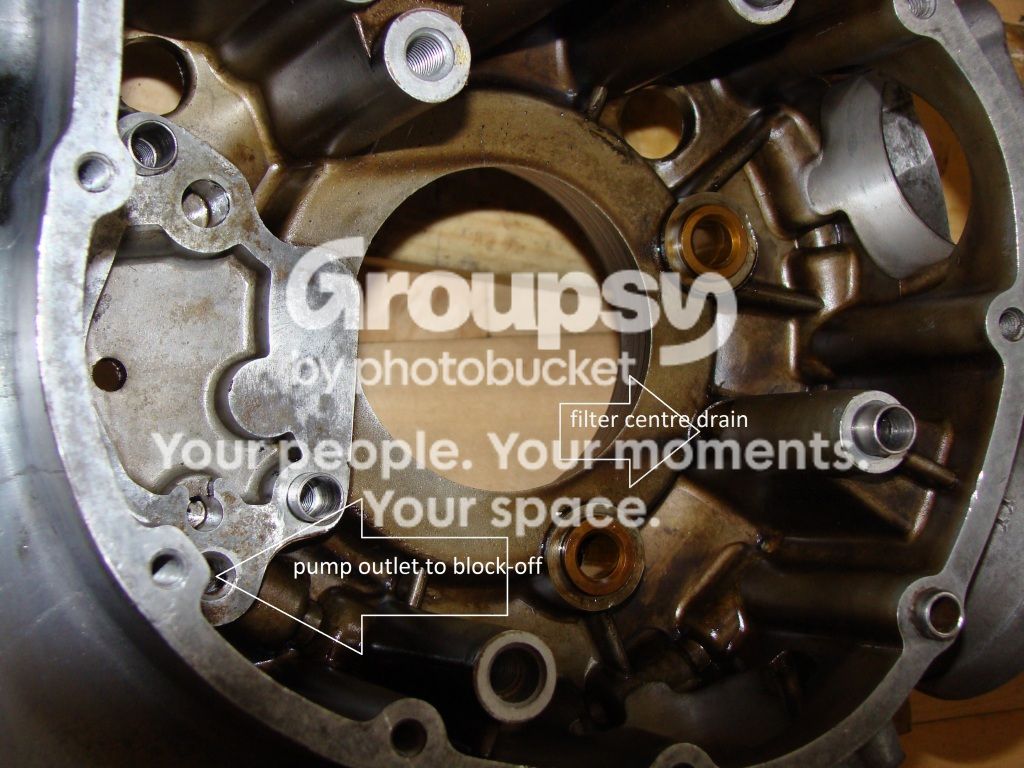
On a standard Darmah some of the oil from the feed gallery is by-passed through a restrictor-hole for filtering. It is a better system to send all the oil from the pump through the filter (Hence 'full-flow')
Evidently you achieve this by blocking the pump outlet and arranging for the oil to be piped up and enter the filter 'backwards' ie up through an extension to the post that goes up the centre of the housing. The restricted hole in the housing where the oil used to come in
holeinfilter.jpg

is opened-up to allow the oil out into the gallery and on to the bearings and heads. The 'lid' of the filter may need to be remade with a better seal to contain the pressure, but MMT thinks that we should give it a go.
 
oilpathwithlabels.jpg


Hopefully this helps to explain the standard oil-path as described above a pipe has to be made to link these two
 
Will do! I ordered my first tranche (!) of bearings from Simon at www.qualitybearingsonline.com as he was cheaper than bearingboys (who didn't reply to emails) and price-matched them on the mains. They should arrive today or tomorrow, so when I've done the necessary drilling of the restrictor-hole i'll pop the cases in the dishwasher for a bit.
 
Thank you GDBD59. I'm waiting for my crank to come back and searching for wider or taller oil-pump gears so that MMT can have a go at making an oil pump when he gets back from holiday in a fortnight. He'll probably tell me that there's nothing wrong with the original and to put it back!
 
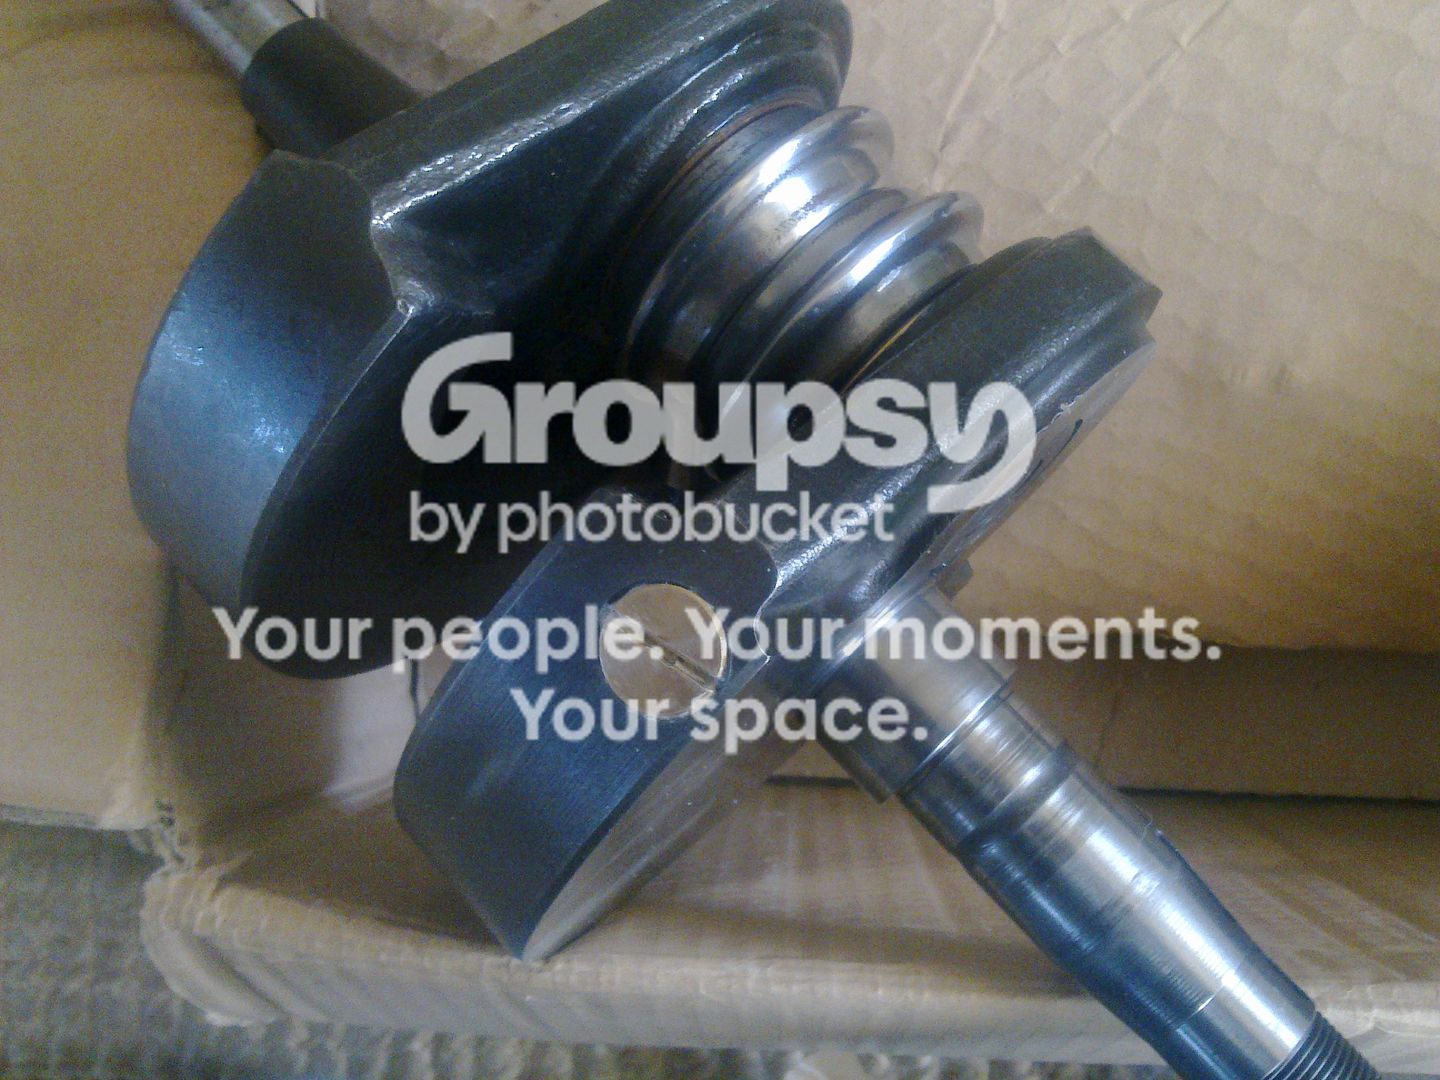
Well it does seem like ages since I last posted as I waited for the crank to return from Goddens. Last friday, after I sent an indecently large (But reasonable in the scheme of old Ducati parts) amount of money a heavy box arrived. Under the usual layers of local newspapers and those bits of polystyrene that get everywhere was a crank with lovely new plugs
crank-1.jpg


and a 'Godden' marked crank pin.

endofcrankpin.jpg
I wasted no time until the COW (contented older woman) was out shopping before slapping the cases in the oven and fitting the bearings.

casesonoven.jpg


Bolting the cases together with a dry gasket but without a shim gave a satisfying lack of end-float but the rotating assembly wasn't as free as I expected. naturally I gave MMT a call. He came and said that he thought it was 'a little tight, maybe a couple of thou' As you undid the case bolts it sprung apart slightly We discussed all the options for solving this:
1. Doing nothing. This would cause premature wear in the bearings
2. squeeze the crank a touch. I could hear Gary at Goddens crying as he told me that would mean the crank would need realigning
3.Grind the shoulder on the crank. Quite hard to set up in centres and a bit risky
4. Think laterally and look at polishing the bearing housing to allow it to sink further into the case and give clearance, with the note from MMT that their might be a bit of sh*t in there stopping them seating, anyway.

I think that I'm going to put the cases back in the oven and take out the mains so I can look at how they fit in the recesses, with a view to a bit of fettling
 
The mains dropped out with hardly any heat at all (so some loctite will accompany their final replacement) I Rang Goddens first and their resident genius, Gary the crank, told me that they always measure each crank as it arrives and remake it the same, give a take a thou or two. On their race engines they use large clearances to reduce friction so their cranks are almost always 'small'
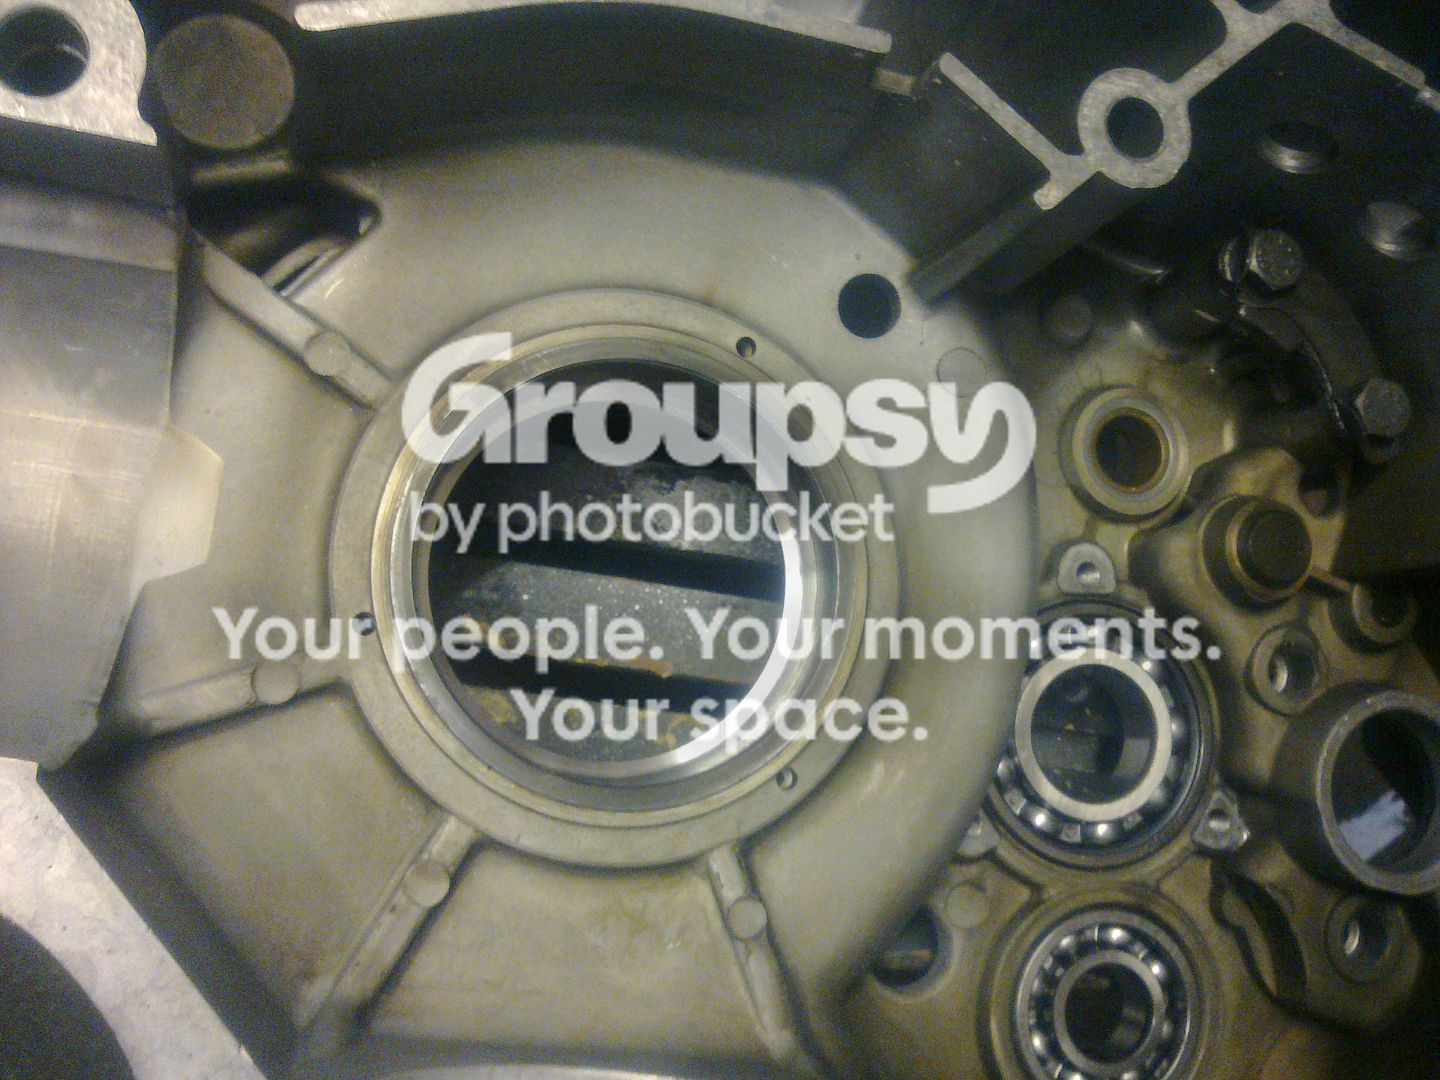
My suspicions moved to the housings, which are hardened steel rings shrunk into the castings.

Sure enough, there were raised 'rings' in them that might stop the bearings seating properly and had trapped little bits of debris. Casting about in the house I came across a porcelain ramekin of the kind you get small puddings in. It had a rounded edge and was just undersized.

gadget.jpg


Starting with 80 grit paper I used it like a large valve seat cutter and cleaned up the faces. Before and after measurements showed that the bearings had moved about a thou or so each and a dummy build showed that the crank is a lot freer, if not yet perfect, but the touch of gasket goo between the housings should sort that.

housing.jpg


Now I can start the next bit of the rebuild.
 
Take care and not use too much loctite, my mate had the same problem and he ended up feckin a bearing by applying too much goo.
 
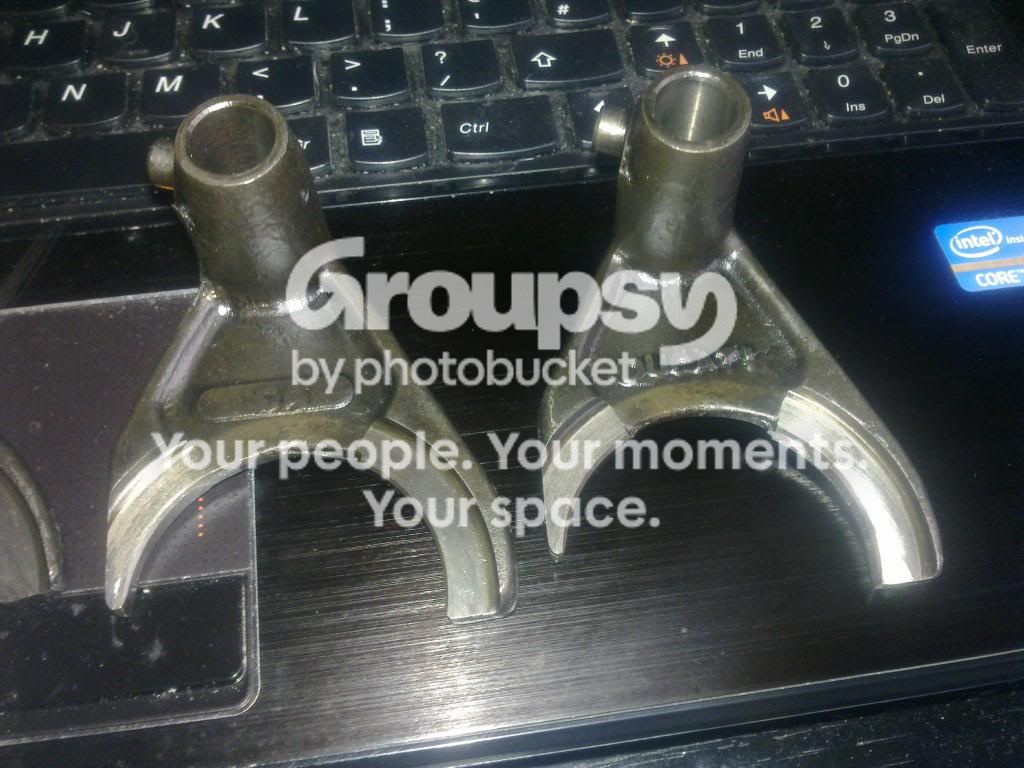
I was writing a poem today for a very interesting guy's 80th birthday (It's what I do) and it all went a bit better than expected, so I got some time at the bench. I started to put all the bits back in the cases and came across a couple of issues. The first time I assembled main and layshafts there seemed to be a sort of conflict involving 5th gear, which would only engage half-way. Since that was the one which had a half-broken tooth I think that the previous assembler may have experienced the same issue! Building the shafts up in situ cured that but I did notice a lot of wear on a selector fork so have been looking at the cost of replacement. £250:Astonishing! there is a firm in Germany that sells exchange re-built ones for €80 but I think I need to talk with MMT!
 
I now have the gearbox built into the cases and despite the wear on the forks it seems to select gears but not in a smooth way. That may be due to my being more used to horizontally split cases where both ends of the shafts are supported when you are trying the box out before closing it up.
I played about with the shims that space the selector drum and looked at the pegs and slots as they moved but couldn't make a huge improvement in a small (0-2mm) range of adjustments.
I put the shafts and gears back together with all the original shims but I cannot find out what the correct clearances are, both for the gears and the selector forks (If I can measure them against a service limit I can get them built back up if I need to) They aren't in my Haynes. I would like to spend some time getting that right if I can. I realise that these are a little esoteric but they must be on the net somewhere.
 
Thanks Mr 239. The manual just says that there should be no play or wear on the forks but I have never seen a selector fork without some wear. I'm going to ask MMT his opinion based on building lots of Japamotors and knowledge of gears. One thing I will not be doing is using gasket blue on the joint as I can guarantee that I'll have to split the cases again! (I'll use blue on one face and grease on the other) As I said before all the original shims have gone back in but I have no guarantee that it was correct after a possible previous rebuild or just wear after 40000 plus miles.
 
I've found some info for a multistrada which uses a thinner 'groove' into which the fork fits (presumably to save space for more gears and weight, perhaps). That is around 4mm whilst the darmah is 4.8mm. The multistrada info specifies a maximum service limit of 0.40mm on a fork of 3.9 - 4.0mm and that the actual clearance should be .070 to .285 which is quite a range.
In order to make some sense of what I have I measured my selectors at their thinnest point and was surprised that the most worn looking one


singlefork.jpg


Is actually just inside the service limit and the other two

twinforks-1.jpg


are 0.1 mm too thin. I rang the local hard chromers but they tell me that the 0.35mm I'd want to add would be too much for the process and to look at welding instead so it looks like I need to talk with MMT again.
 
Martin,

I'm in a similar boat with my MHR gearbox. Mine broke 2 teeth off 5th gear, so I've stripped it and I'm saving up for 2 new gears!

What I've been told by the various experts I've shown the box to (bevel experts that I was fortunate to get in 1 room at a classic event earlier in the year - I took the box up to the event on the back of my Guzzi Monza!) might be of interest to you as well.

Apparently the selector forks could look worn even when they were new - one of mine has the Ducati logo fairly worn down, but that didn't seem to bother them. What they said was that the main concern with the forks was that they weren't "blued" with heat, and yours look fine.

I noticed you had said that one of the gears didn't appear to be fully engaging. Again I've got that, but that also didn't seem to bother the experts! The did say the main issue was to ensure there was zero end float on the shafts once everthing is tightened up.

For what it's worth, I'd build the engine up and get it running and see what it's like! As I say I thought the guys that I showed my box to would be saying I'd need all sorts of parts, but they really just shrugged their shoulders and said "get the new gears and a bush and it should be fine"!

Cheers,

Kenny.
 
MMT would doubtless agree with you. My workshop manual specifies 0.2-0.4mm endfloat on the layshaft on one page and 0.1 to 0.2mm on another. It also suggests that the mesh of the dogs on 5th and the motion output shaft is important. It can be adjusted by shimming up or down at the right-hand end of the mainshaft.
My 5th gear didn't mesh properly at first using the recommended order of insertion of shafts into the case. I ended-up putting one bare and one built-up shaft in and building it up in situ, which worked lots better.
Nigel says that he did have success in the past with hard-chroming but I don't have a very local one, so I'm going to see a local metal-sprayer and ask his opinion tomorrow.
Thanks and good luck.
Martin
 
Back
Top Bottom