900GTS build...

Cheers VP
I am going to pick up your old Imola from a friend next week. See how it sits on the Darmah.
...Snip...
I have a new one of these you can have which I bought when I was still thinking of hackery to make the narrow frame Imola fit the SS. The tank you have didn't have a filler neck and it's yours if you want it. It's about as much use to me as most EU regulation is to those who want to export to China.
 
I will certainly buy or trade it with you if its spare but i will check fit with your old one first, i suspect the wide frame, narrow frame is for the early 750 wide frame and the late 750/900 narrow frame , not the Darmah ?
Strange thing was the old tank i had off you fitted the S2 900 frame spot on.
 
Preparing for the build...

Last year I prepared for the build by making sure both bays of the garage were clear and it was reasonably tidy; That's a personal evaluation of a system based on chaos.

Almost the same day, my family thought that it would be a great idea to fill these empty spaces with 'stuff' from a rented garage so we could stop renting the garage. All good thinking however it really threw a spanner in the works for in me using the garage for anything.

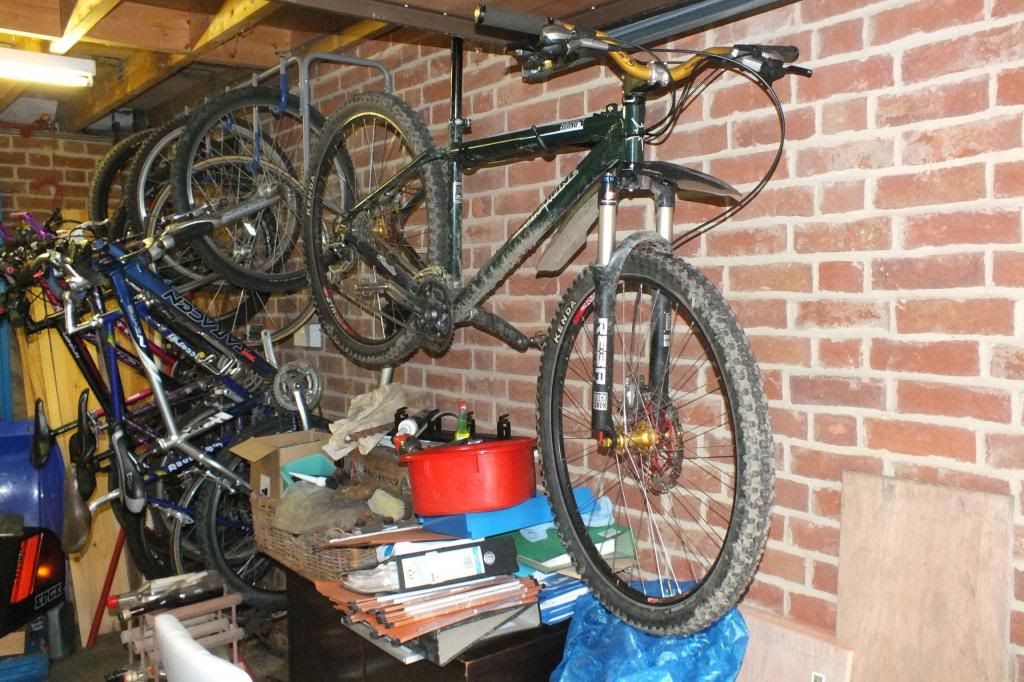
How was I supposed to build in the the garage whilst it was full of 'stuff'? I had to tidy it. I had a ruthless morning ejecting 'stuff' and bought one of these cycle mounts.

Here it is done...
DSCF1008.jpg


And the last bike on it's own stand as it gets used a lot...
DSCF1010.jpg

Which meant I could stick the black & gold in the second bay, leaving bay 1 free in which to build the GTS.
DSCF1007.jpg


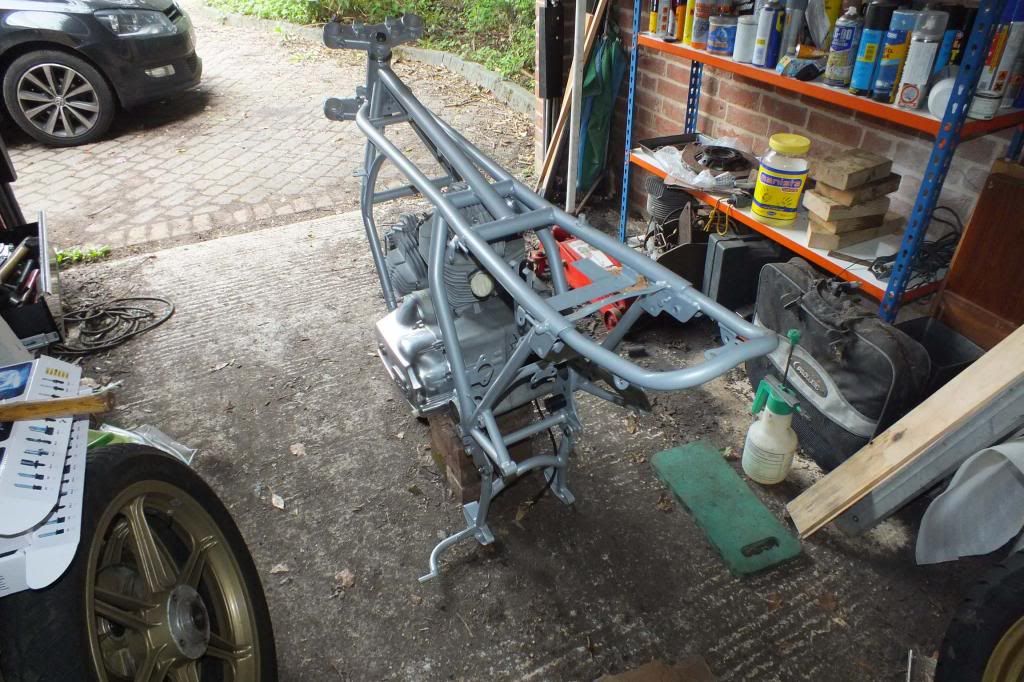
I found dropping the frame on to the SS motor impossible without removing the clutch & alternator covers first. I wanted to avoid taking of any covers with the GTS since Biggelar & just about everyone else seem to be better than me at making gaskets seal. Anyway, I managed it without any problems with the GTS frame; Without further ado, centre stand on, engine goes in and yokes on...
DSCF1012-1.jpg


Next step was to rebuild the forks. I bought a large bottle brush from a brewing shop a while ago and I can't tell you how perfect & brill it was for cleaning the fork stanchions & tubes prior to assembly. It was stupidly cheap and fantastically useful & effective.
DSCF1016.jpg


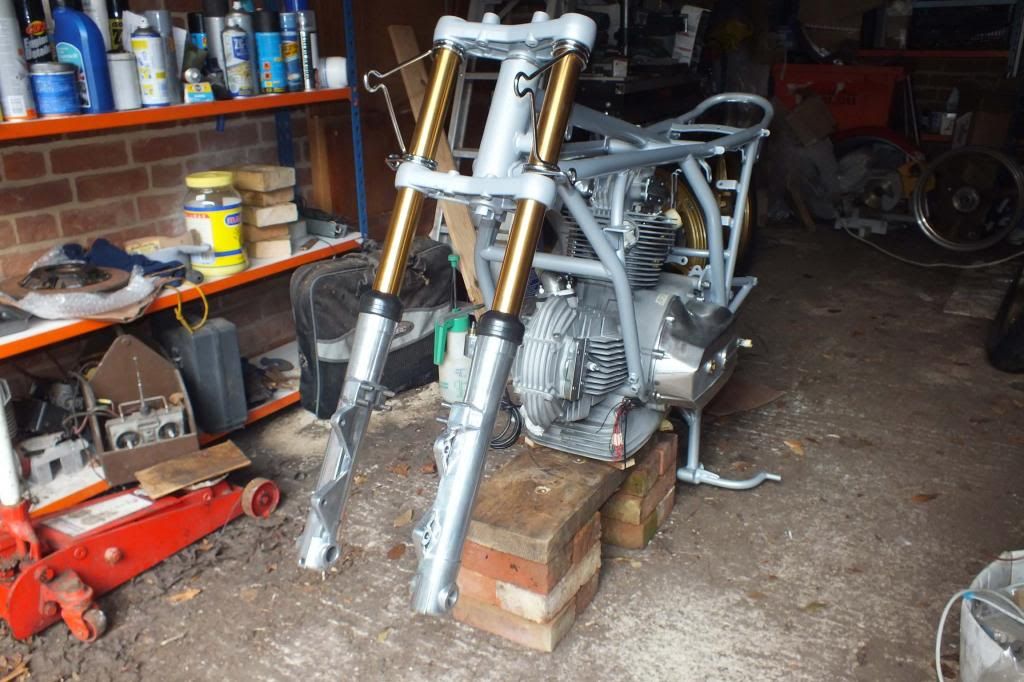
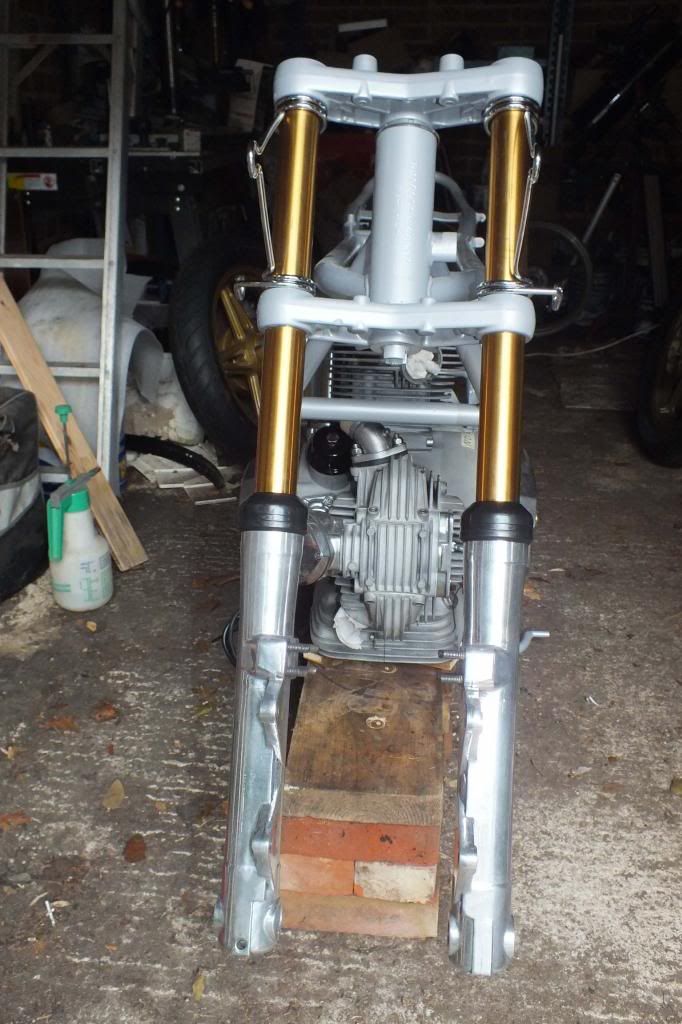
And here are the original forks rebuilt with the fork lowers re-polished, stanchions re-hard chromed & finished with Titanium Nitride, new seals, dust caps, re-chromed headlight mounts and filled with the correct amount of Morris 5WT suspension oil. Whey Hey Hey! Comin' along...
DSCF1018.jpg

DSCF1019.jpg


And here is a quick look at the crankcase saver once the engine is installed...
DSCF1013.jpg


If I had the suspension bushes, she'd be free standing on her wheels now. Hey Ho.
 
Last edited:
Swinging arm on...

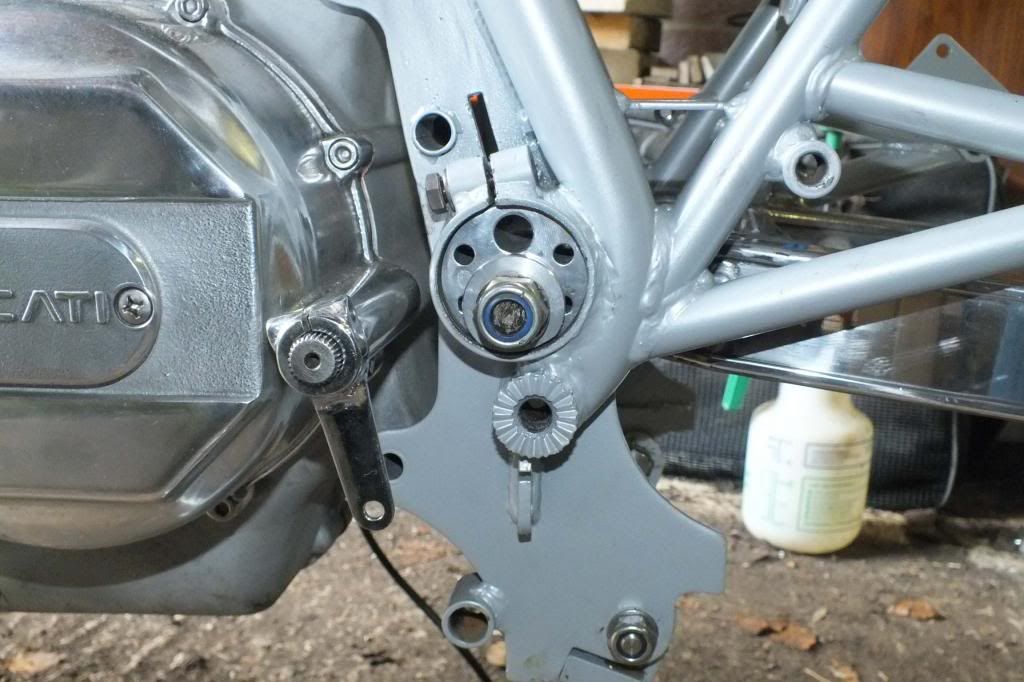
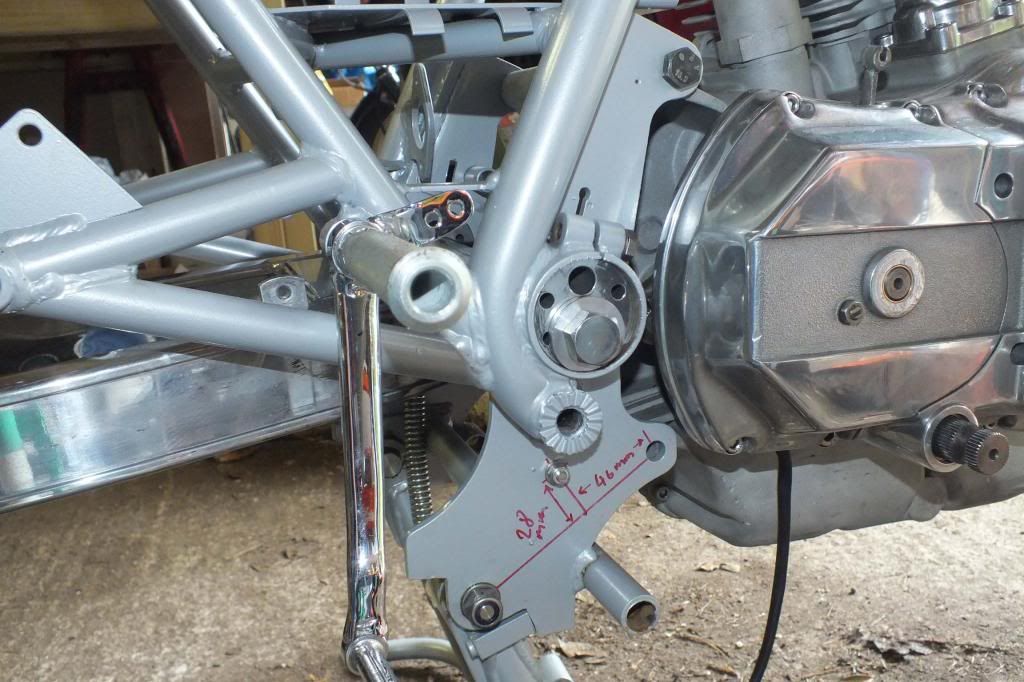
Thanks to Mark @ Cowfold Engineering, I now have the swinging arm spigots. I polished up the GTS eccentrics as I can no longer fit the plastic cover now the sigots are in place; They look pretty spiffy anyway.
DSCF1028.jpg


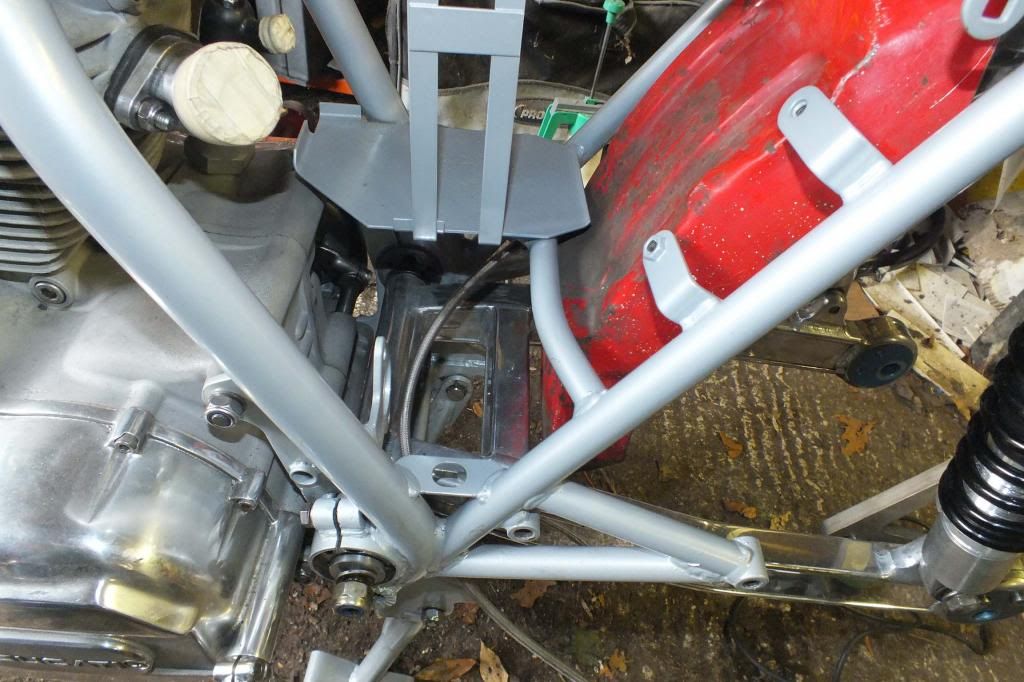
The swinging arm had descended into a uniform dullness and I wasn't looking forward to bringing it back - but with my bench polisher it was pretty easy & quick. I had mocked up the swinging arm & frame so I expected it all to fit - and it does.
DSCF1029.jpg


The swinging arm is neat design in several ways, apart from simply accepting a larger tyre. The whole assembly is pinched together so there are no shims. Simples. It also has neat dust/grease seals so it all stays clean & greased inside.
DSCF1030.jpg


I also mocked up the rearsets & master cyclinder, so I am pleased to say that all works with the standard parts too.
DSCF1031.jpg


My gearchange lever did clear the gear change linkage but I felt it was all a bit close, so I set about modifying (bending) the lever to give what I felt was reasonable clearance - I didn't want it fouling at an exuberant moment. I have been collecting shagged bits & recycling them and this lever had had a new toe bit welded back on - it must have been dropped at some point. It was looking lovely in it's new chrome until I started bending it... and 'Snap'. Oh dear.

Anyone got a reasonable replacement bevel rearset gearchange lever? I can re-cycle this one when I find the end, which went 'ping' but perhaps it is time to move on.
 
Sunglasses anyone?

Whey hey hey!

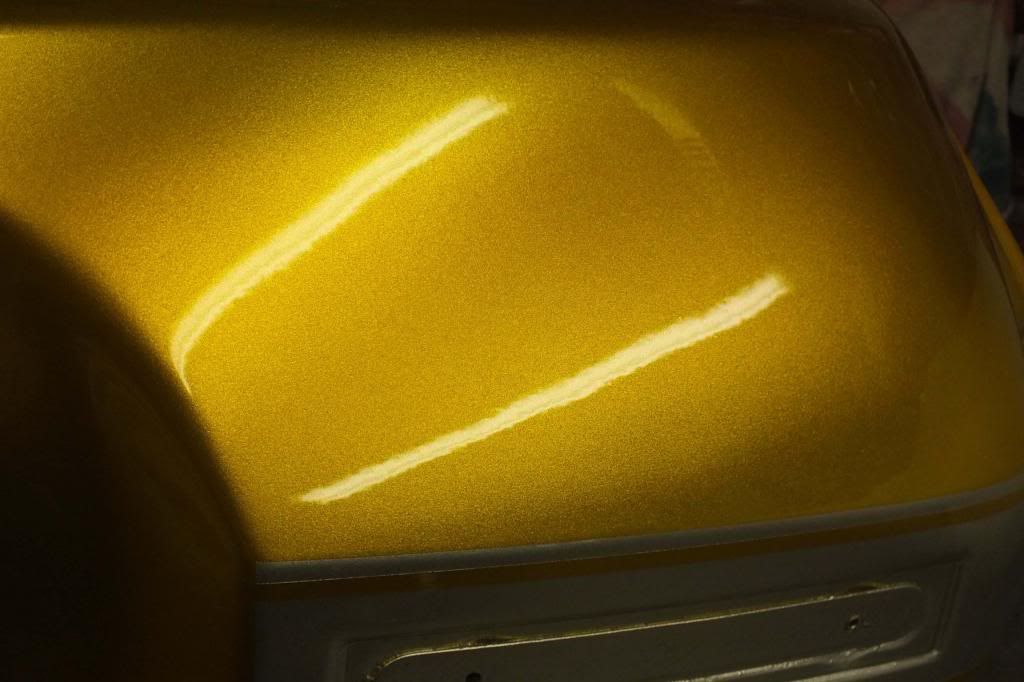
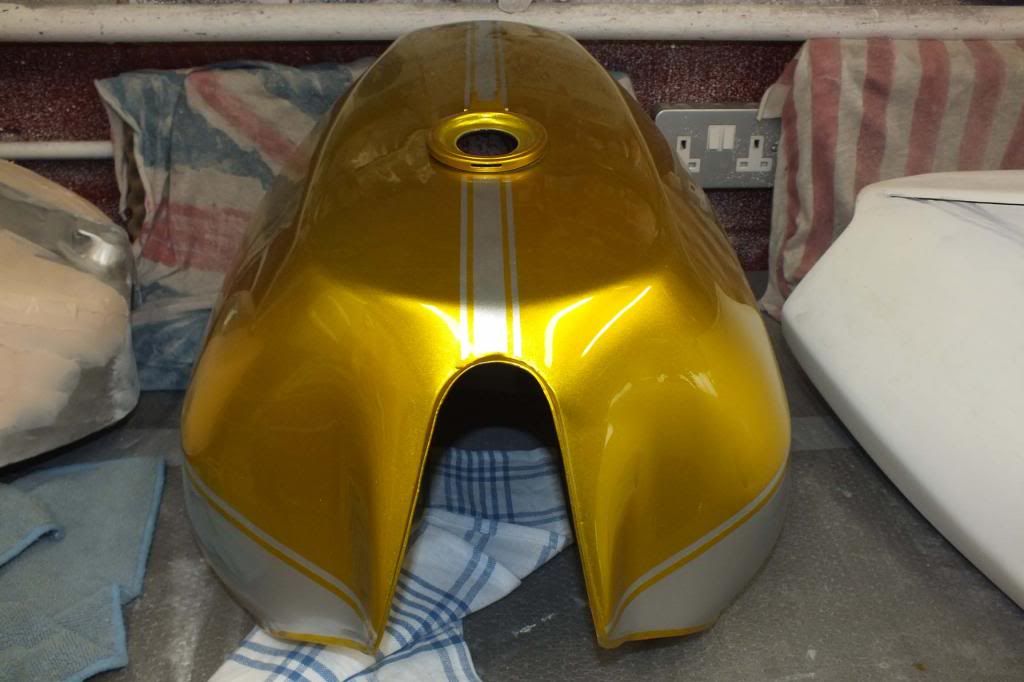
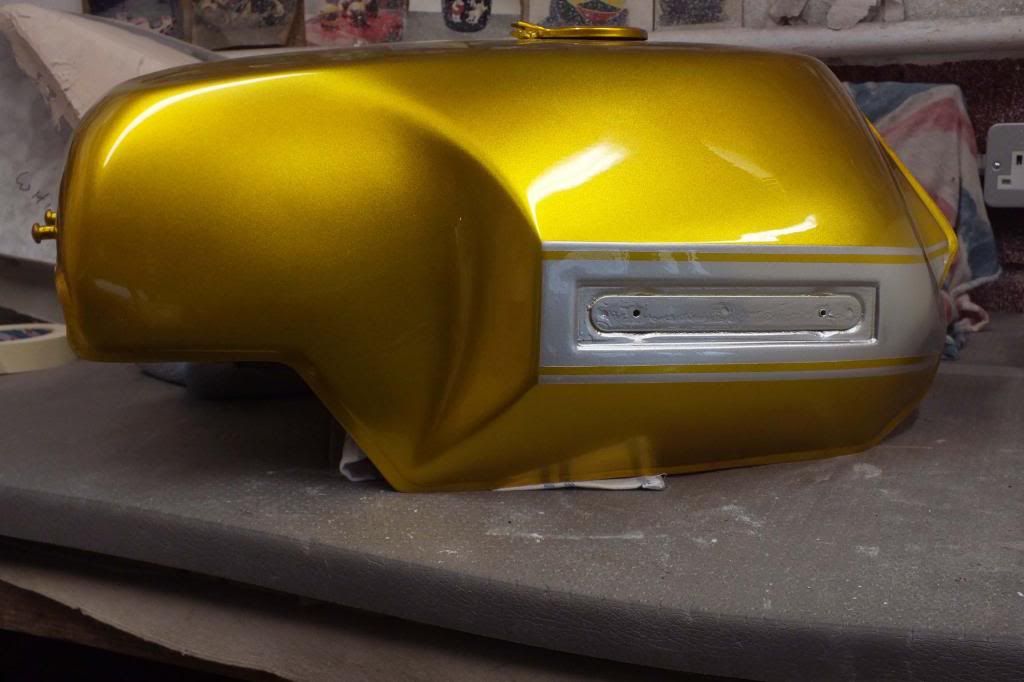
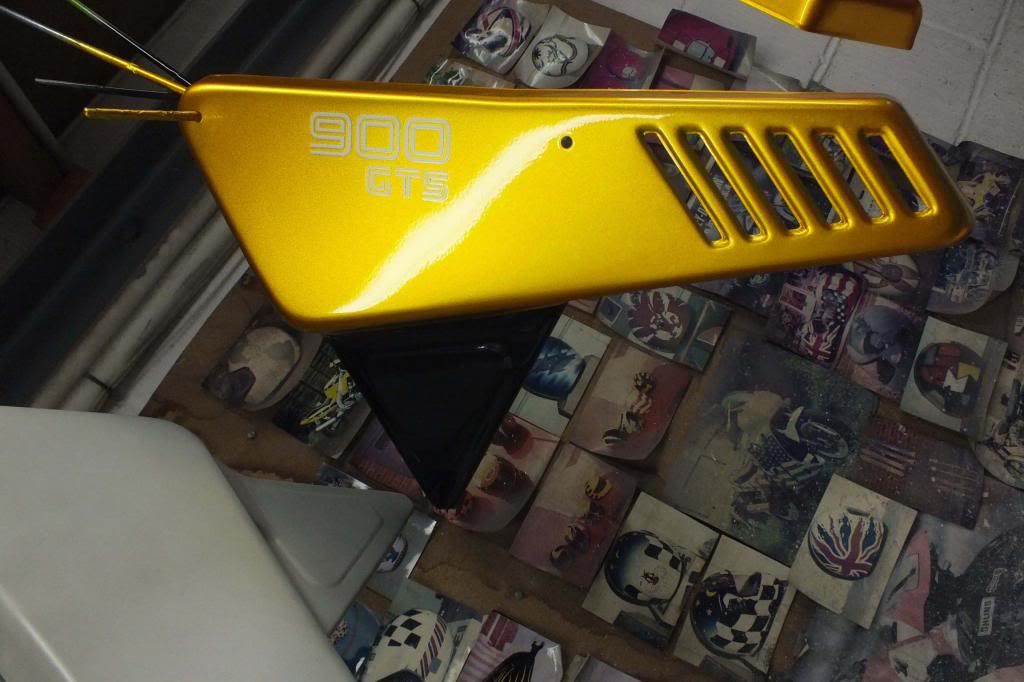
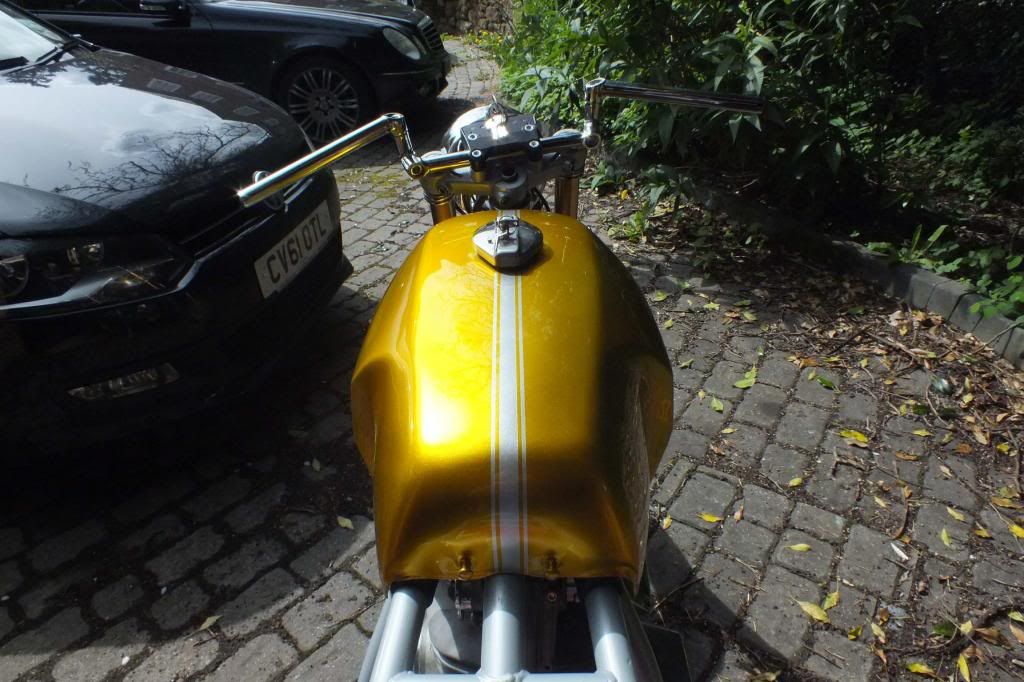
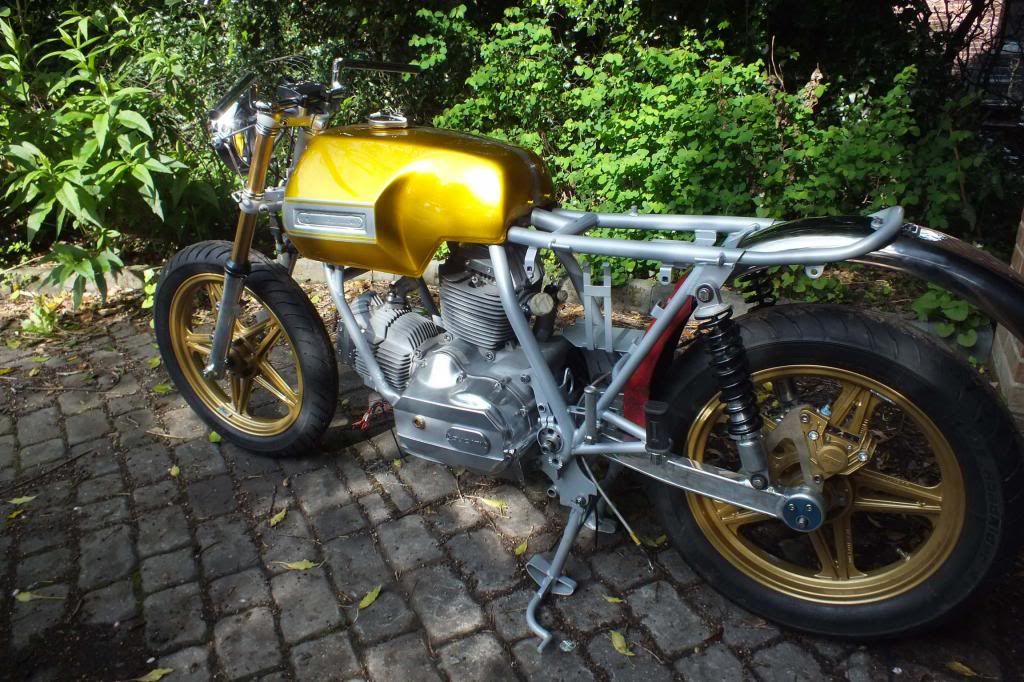
The paintwork is finished - it isn't exactly how I imagined it (Fizzy Candy Gold) but it isn't far of and the translucent gold coat over the heavy metalflake makes it look like you will fall into it.
DSCF1036.jpg

DSCF1041.jpg

DSCF1039.jpg

DSCF1035.jpg

DSCF1034.jpg

DSCF1032.jpg

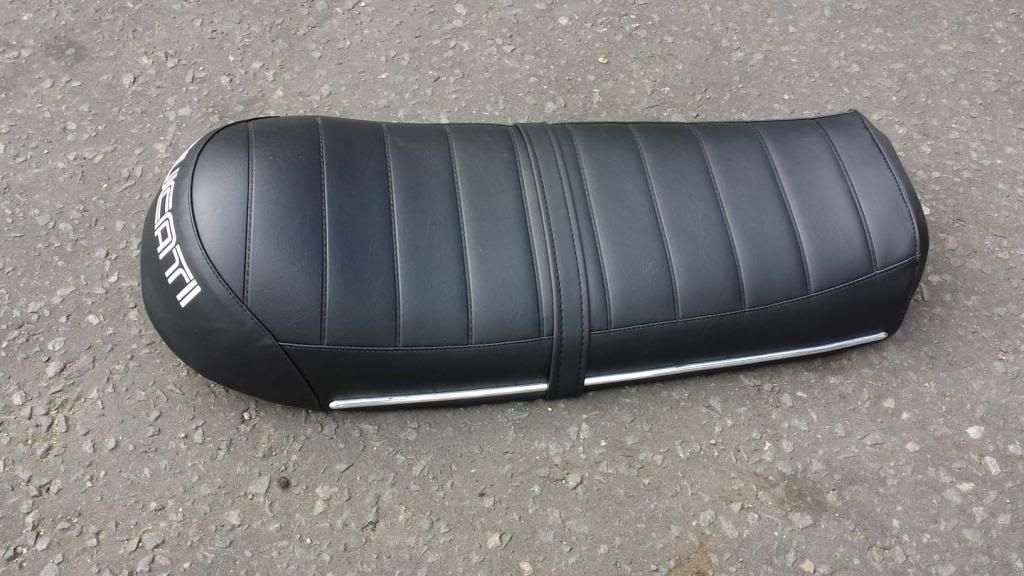
And the seat too! Not as nice as Derek's but that isn't the seat coverer's fault, the cover is just plain different. I am still pleased with it, a lot better for the pillion than the Imola on the SS :D
20140418_145639.jpg


20140418_145644.jpg

That's it for now, time to do some wiring/building.
 
Last edited:
I see what you mean but actually i prefer that to the old FS1E gold. It looks like a proper custom job rather than a tin of Halfords metallic in the garage. That clear gold over silver is something you just cant replicate unless you are pro. It certainly would have been the star of the show in Horsham today, mind you your SS stood out a mile anyway.:)
 
I see what you mean but actually i prefer that to the old FS1E gold. It looks like a proper custom job rather than a tin of Halfords metallic in the garage. That clear gold over silver is something you just cant replicate unless you are pro. It certainly would have been the star of the show in Horsham today, mind you your SS stood out a mile anyway.:)
It was the shocks that did it :)
 
Wiring & (slow) assembly

Time to get on with a few things I have been avoiding. Not quite sure why, I love wiring but there you go.

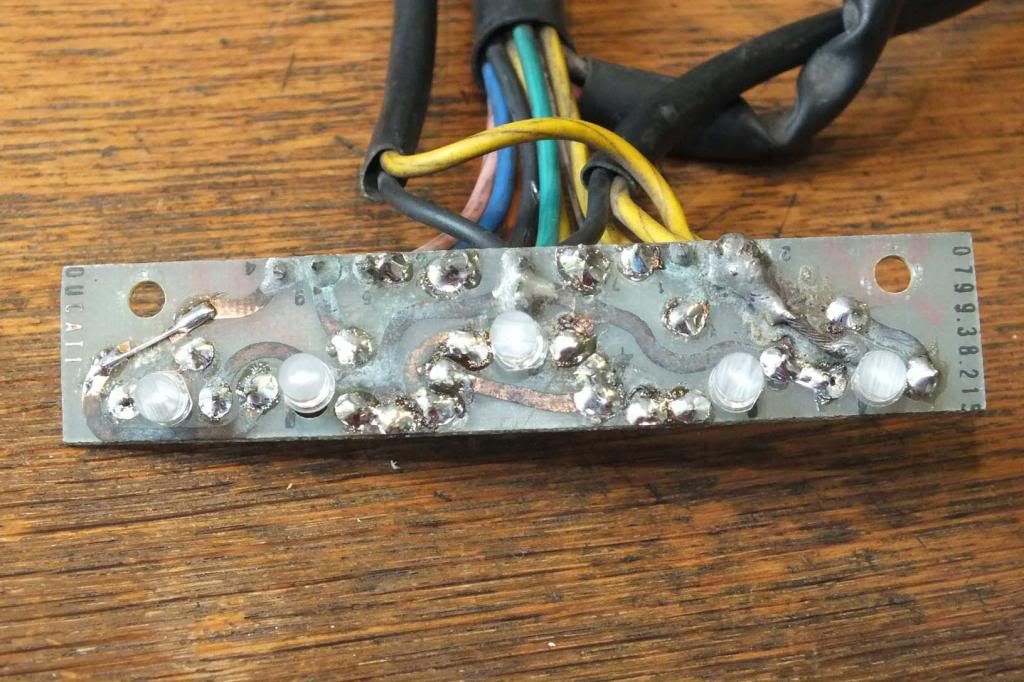
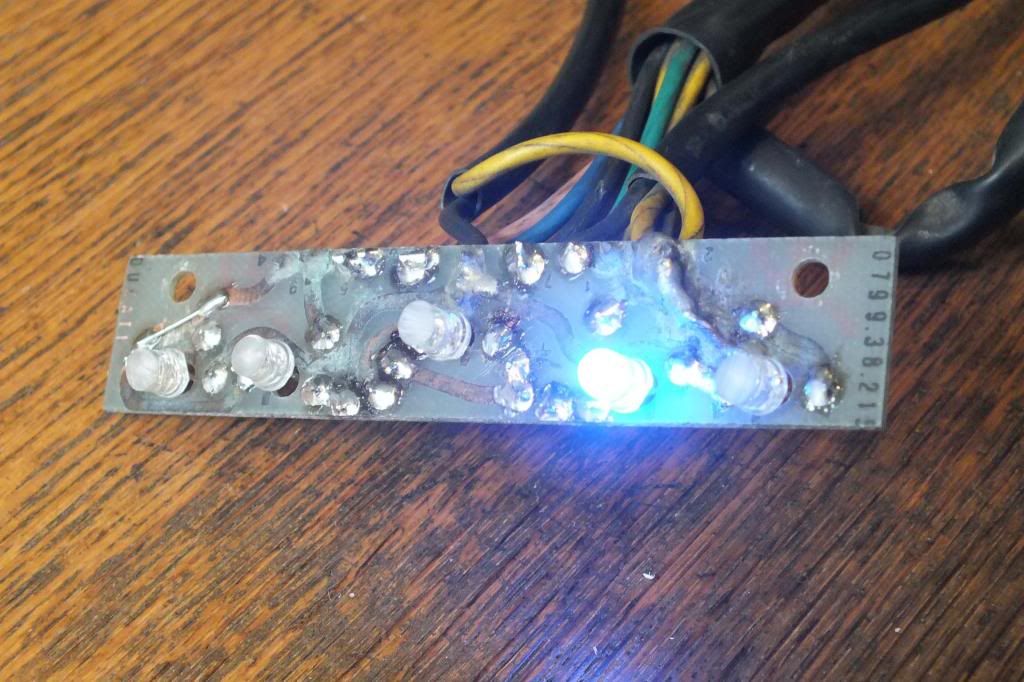
The dash needed a bit of TLC from previous hackery and whilst I have been considering knocking up a new board with some light sensitive trickery, I thought I'd build it up to first see how bright the modern LED's really are.

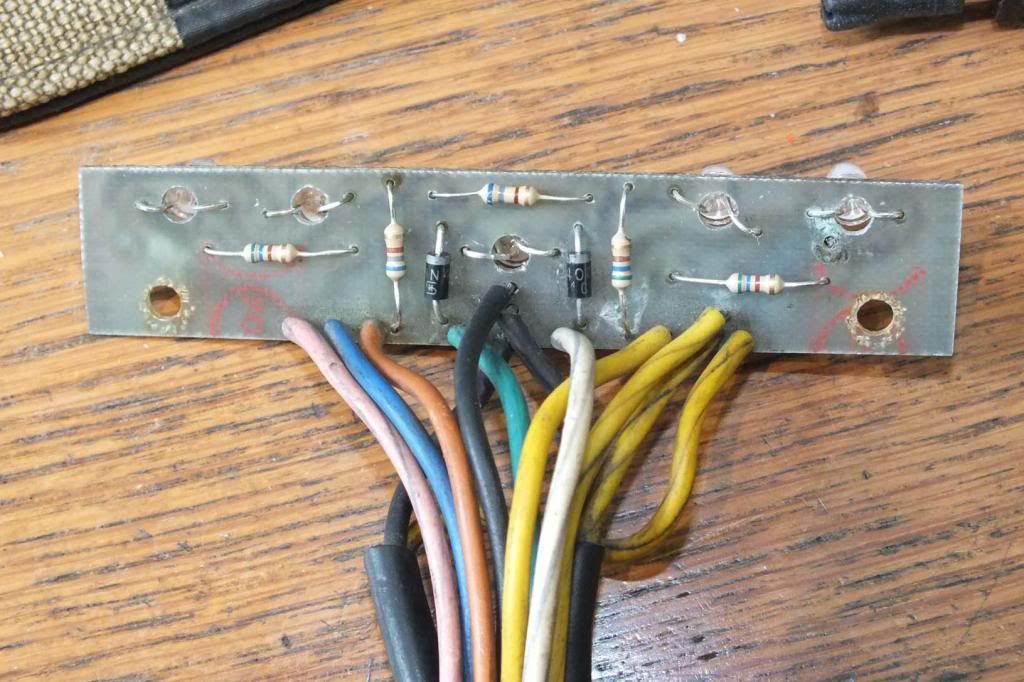
I don't think I took any pickies of the board pre repair but it wasn't very exciting anyway (and still isn't). So here we go, new resistors, diodes, some track repairs and modern LED's.
DSCF1077.jpg


I couldn't see any reason to stick with 3mm LED's so I drilled out the dash (but not the plate cover) to accept 5mm LED's thoughout, before I had it stove enamelled. That wasn't too bright as the LED's wouldn't fit and I had to file out the paint :fou:.

I couldn't see why there was any point in seekeing out flat top LED's either as they are more scarce & expensive, why would I do that when I have trusty old bodger grinding wheel in the garage? The grinder has the added benefit of leaving a matt finish for better light dispersal, all by design, of course :).

DSCF1075.jpg


and fitted...
DSCF1078.jpg


Hmmmm... the headlight idiot light is... well, bright.
DSCF1073.jpg


Bearing in mind how bright they are (they are all really bright) I fitted heatshrink collars around their bases to stop light bleeding between them, here is the indicator light before I had fitted the collars...
DSCF1081.jpg


All good, let's take a shufti at the loom.
DSCF1094.jpg

Yes, you guessed it! It is a burnt out bodgers banquet! Oh :censored:.

Have a look at the heat damage to the spade shrouds! I haven't even dared to unwrap that cheeky bit of tape... :huh_oh:
DSCF1088.jpg


Nothing like a bit of sticky tape, clip-on connectors & sealing wax. He/she seems to have felt a need to 'help' the flasher unit at some point, I am guessing the lovely bit of white wire drove the Lucas Rita.
DSCF1093.jpg


With the odd relay tossed in (not far off the mark).
DSCF1089.jpg


And check out this feature guaranteed to help me make my first fire insurance claim and no, it's not me plucking off deliciously dilapidated tape for extra effect, this is really what I found...
DSCF1097-Arrow.jpg


I am not surprised the owner stopped using it, I think the bike did a Herbie & refused to move.

Ami I bothered? Not really.

Time to roll sleeves up, wheel out the soldering station & heatshrink gun & get on with it. I have to figure out where to put the Silent Hektik electronic ignition as it didn't come with a bracket as far as I can tell. I also have to find a good place to put the H4 HID ballast & relay.

Anyway, I am making (slow) progress. There has been a formal request that I curtail spending for the time being, not too surprising or unreasonable if you saw my overdraught. Nevertheless, I felt a need to put my 900SS seat on the frame, have a sit and see what I could see. This is what I saw; I was pleased :D.
DSCF1099.jpg
 
Last edited:
Looks better each post!
I used flat topped 3mm LEDS (£1.65 for 10, including resistors!!) and a Maplins circuit board. The result is way too bright, even after "matting" them down. I was hoping you could tell me how to put a gizmo in to reduce the intensity a bit. The H4 headlight is great, but it's hard to see past the idiot lights.
Not sure if I'd trust that wiring loom. Better a trip to Vehicle Wiring Products.
My Sachse box fitted very nicely between the frame tubes velcro'd to a plate which is mounted on the horn fixing. Have a look on the Black Pig thread.
 
I haven't given up - I just took the shortest route. My ideal solution would a new PCB incorporating the extra circuitry - with the components facing upwards and being drilled to accept the LED's directly so they could be soldered in situ.

Not yet ;). I want to get it built first.
 
Looks better each post!
I used flat topped 3mm LEDS (£1.65 for 10, including resistors!!) and a Maplins circuit board. The result is way too bright, even after "matting" them down. I was hoping you could tell me how to put a gizmo in to reduce the intensity a bit...
They just need a suitable resistor in series with them to reduce the current. Assuming they have a common earth you could fit one resistor to dim the lot. If not you could adjust each one individually by increasing the value of the resistors already fitted. I see a few 680Ω resistors there. Try doubling the value to about 1.4KΩ for a start. If still too bright take it up to 1.8KΩ or even 2.2KΩ. If it's too dim take it down to 1KΩ. You may want to experiment with a LED off the board until you decide which values give you the best results. You might like to keep the indicator warning LED at full brightness.
 
Rear mudguard, number plate etc.,

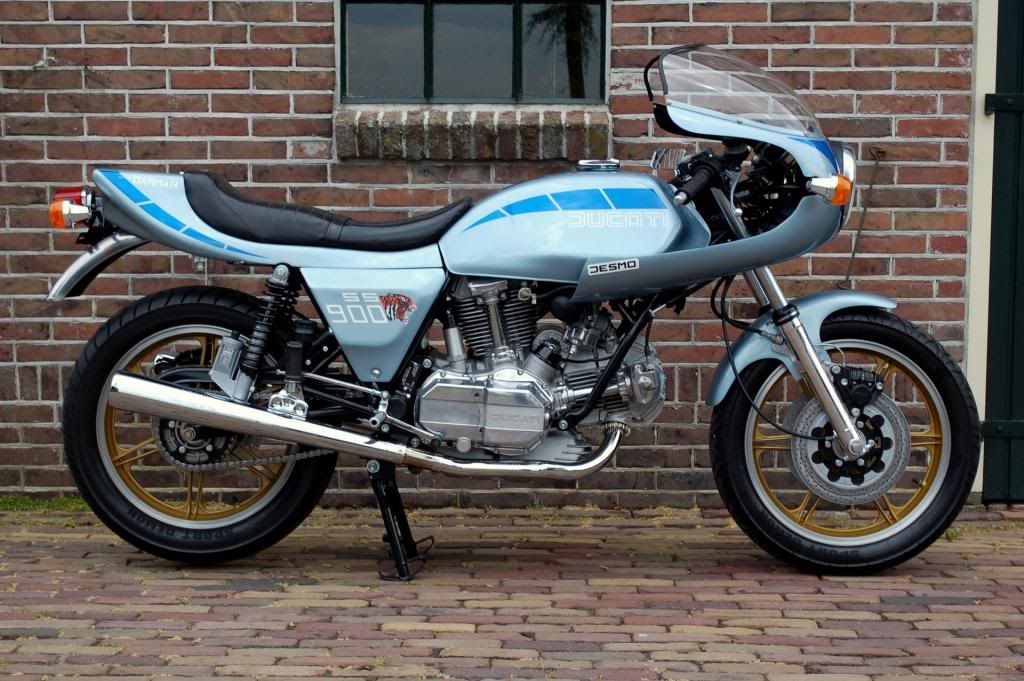
I wanted to use a stainless rear mudguard as I wanted to keep some hints to the identity of the bike intact in case anyone misses 900 GTS on the sidepanels, so although I have a spare set of SS f/glass mudguards, they are out as they aren't stainless steel.

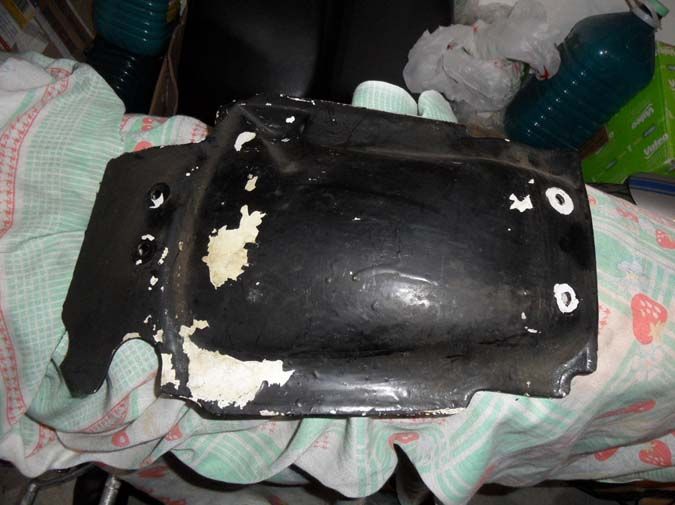
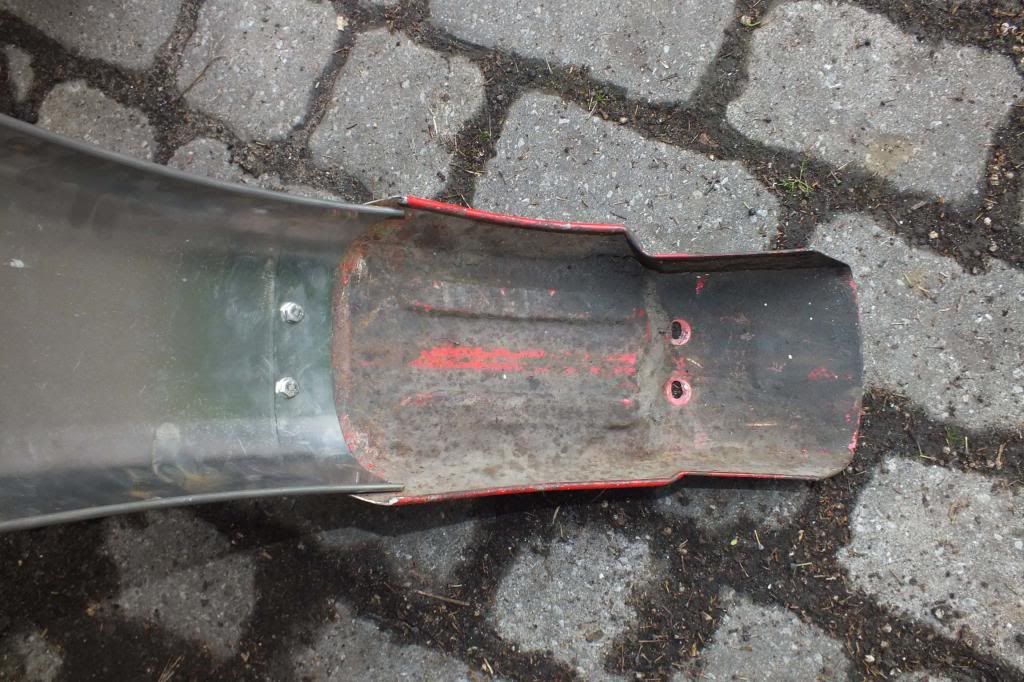
I also wanted to shorten the rear mudguard for a slightly less square 70's commuter look. I didn't want to hack my original perfect 900GTS stainless rear mudguard so I looked around. The Darmah has a stainless rear end! Close inspection reveals the Darmah has a 2/3 section stainless rear mudguard with a rather odd inner fibreglass section adjacent to the battery.
2014-04-21_214940.jpg


Great, so I sourced (last year) the necessary parts. However the GTS frame is quite different from the Darmah frame and the GTS has a huge dent in the rear mudguard to clear the enormous overhanging battery tray.

DSCF1122.jpg


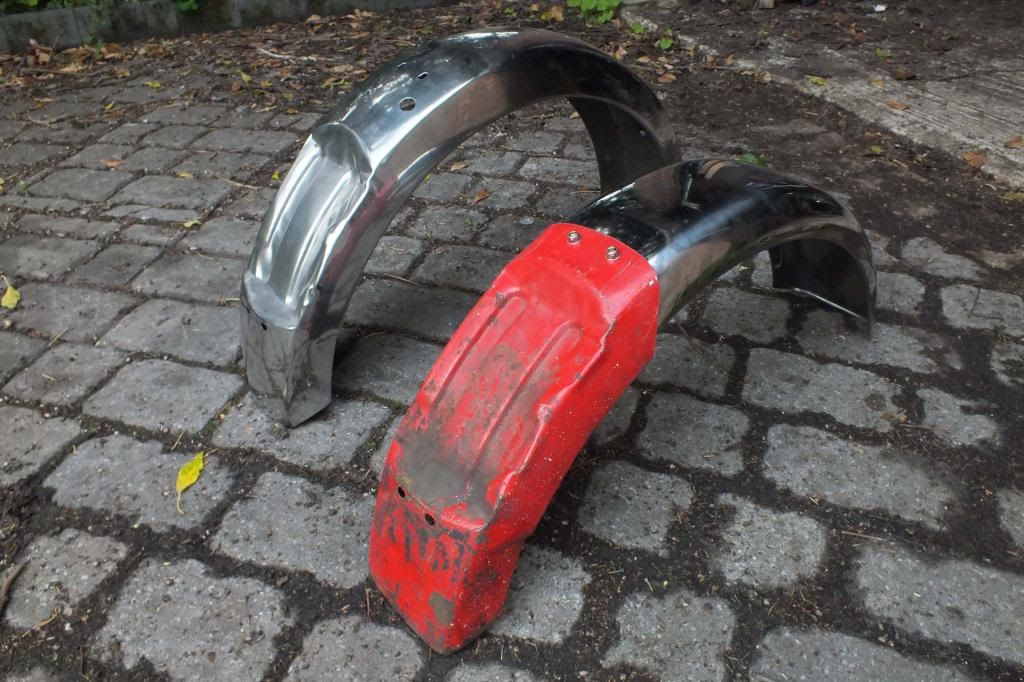
Ho hum. What to do. I have a full set of 860GTS mudguards which came with the bike - a NOS front mudguard in red with a really nasty gold transfer and a totally shagged rear mudguard also in red with silver transfers. If I can replace the fibreglass section adjacent to the battery with a corresponding section from the shagged GTS rear mudguard and use the rear section of stainless Darmah mudguard I am in business. The Darmah mudguard has a different profile to the GTS, nice compound curves whereas the GTS mudguard is angular with sharp bends.

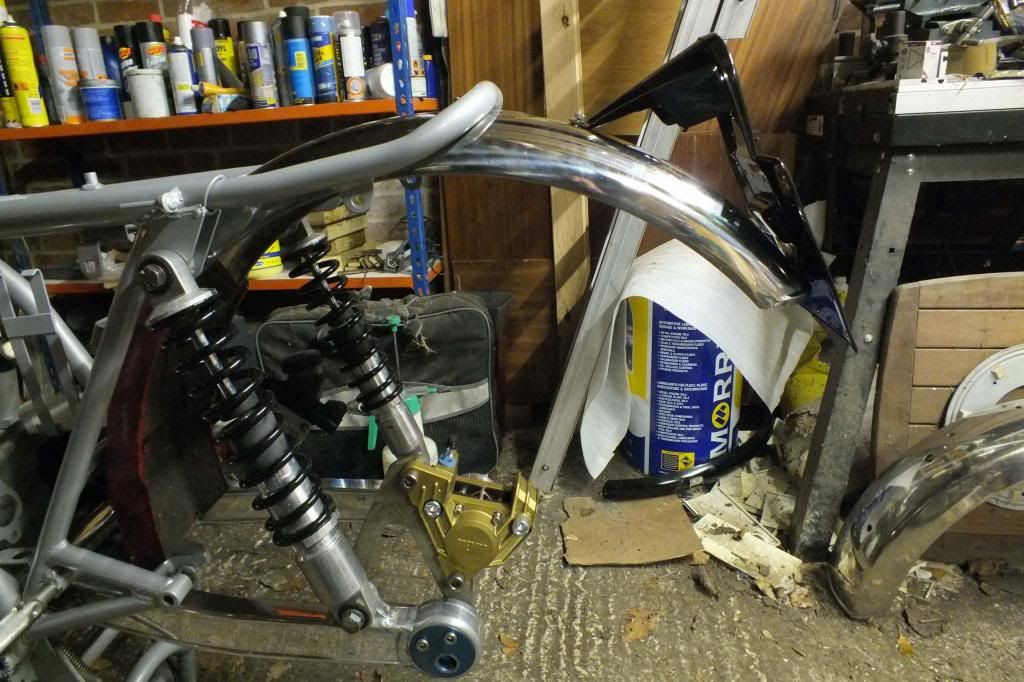
In addition, the GTS mudguard fouls the Metmachex swinging arm so I had a few things to do:-
  • Flatten the curve on the GTS mudguard section adjacent to the battery so it clears the swinging arm
  • Alter the profile of the GTS mudguard where it meets the Darmah section so the curve profiles match
  • Cut the Darmah section so it dovetails with the GTS section
  • Drill mounting holes
  • Modify the Darmah section so it clears the seat lock
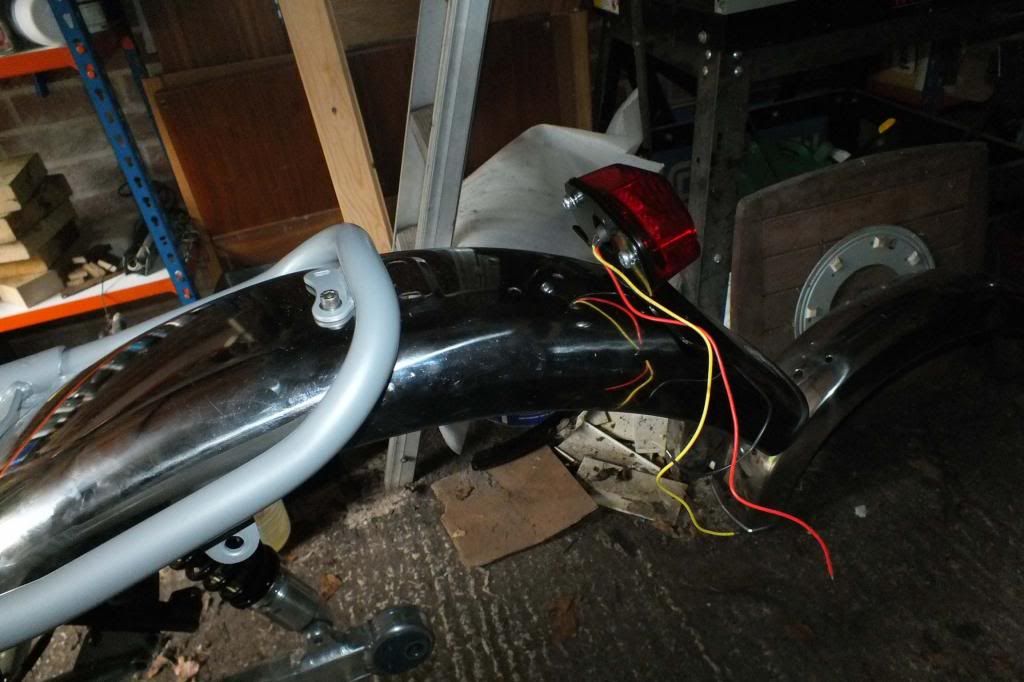
  • Find a new way to mount the rear light where I want it..
Here it is done, including a shot of the unmolested original rear 900 GTS mudguard.
DSCF1117.jpg

DSCF1120.jpg

Next thing is to get the section adjacent to the battery off for powder coating to match the frame.

With these changes made, for comparison the rear mudguard on the SS is approximately 50 cm from the floor when the bike is on it's centre stand. For the revised GTS layout it is 67cm off the floor.

On to the rear lights.

I have a number of options:-
  • Use a Darmah rear light mounting, which makes life very easy as a) I already have one I prepared last year and b) it fits! and c) has inbuilt indicator mounting points
    tb_1920x1080.jpg
  • Use a GTS rear mount and use an SS indicator mount. I have one of these lying about as I had one fall to bits on me, needs a bit of brazing
    DSCF1145.jpg
  • Use a Lucas type LED rear unit I sourced off eBay.
    DSCF1140.jpg

    DSCF1139.jpg

Here it is fitted showing it clears the swinging arm...
DSCF1126.jpg


Let me know what you think. It's late, I am about done.
 
Last edited:
I like the Frankenguard. I'd use the SS light as it is the neatest, unless you can find a similar piece to fair-in the top of the LED light, as that will probably be more reliable. In many ways it depends on the shape of the top of the tank/rear of the seat and Mudguard profile as they will form the stylistic background for the light. The choice usually comes down to 'squared' or 'rounded' Match that in your light fairing piece and it'll all blend into an harmonious whole. (or 'Catherine Jenkins' as my crude friends call it)
 
I never knew there was so much to learn about Ducati rear mudguards! I just took the standard GTS ones and was quite pleased I could polish them up to a reasonable finish.
I think your solution with the Darmah profile shortened mudguards looks superb. I'd use the Darmah rear light mount, then you can use a smaller number plate and have a bit of the stainless guard visible below it. Probably you couldn't do this with the GTS one. Lucas - no thanks!
 
not keen on the way the GTS one mounts with the light pointing skywards - I tried fitting one to the rear of the dramah and came to the same conclusion :) I'd go with the Darmah one, I also used a universal alloy rear guard and chopped that about as that means i could drill te mounting holes for the light wherever it fitted best.. .... i've fitted an early round light to mine as I prefer rounded things to angular ones, thats bikes and women ! :)
 
Yes, I feel the same way. Darmah one it is, then. Lucky about that as I drilled the extra hole last night ;-) Makes the indicators a breeze too. There are a few holes in the wrong place but I can fill in with neat Allen Button Screws and run the wires underneath held with 'P' clips to the button screws so should be quite neat, like standard SS's.

Who is the best one to go to for number plates? I'd like to put on a black & silver small one but don't enjoy being stopped or being gifted points on my licence.

I am interested in how anal you think the rozzers might be with a '78 bike.
 
If you decide to go for a black / silver one get it from Tippers - they are really nice, particularly if you have a 6 digit plate like on my 250
DSC_0424.JPG


http://www.tippersvintageplates.co.uk/phdi/p1.nsf/supppages/tippers?opendocument&part=6

By the way, the Tiger 1050 I just bought had a replacement plate bought by the owner as he was cloned and getting tickets meant for someone else.. It's like this - T11BDW. My initials are just plain DW so I've ordered a 7.5" x 6.5" "showplate" laid out like this. Instant FOC personal plate! How long before I get pulled?

T11B
DW
 
"By the way, the Tiger 1050 I just bought had a replacement plate bought by the owner as he was cloned and getting tickets meant for someone else.. It's like this - T11BDW. My initials are just plain DW so I've ordered a 7.5" x 6.5" "showplate" laid out like this. Instant FOC personal plate! How long before I get pulled?"


Not long, I suggest. I used to have a No. Plate that read R41D and then 2 further letters. I got fed up being stopped and saying "It came like that", and and reverted to R 41 DXX
 
Paintwork & a bit more wiring...

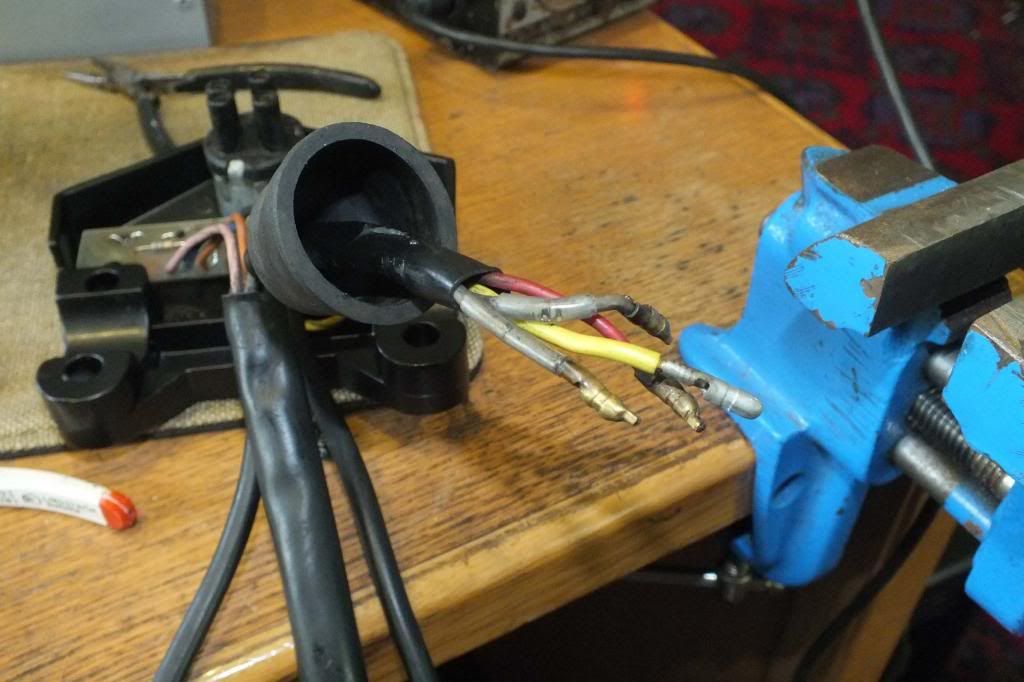
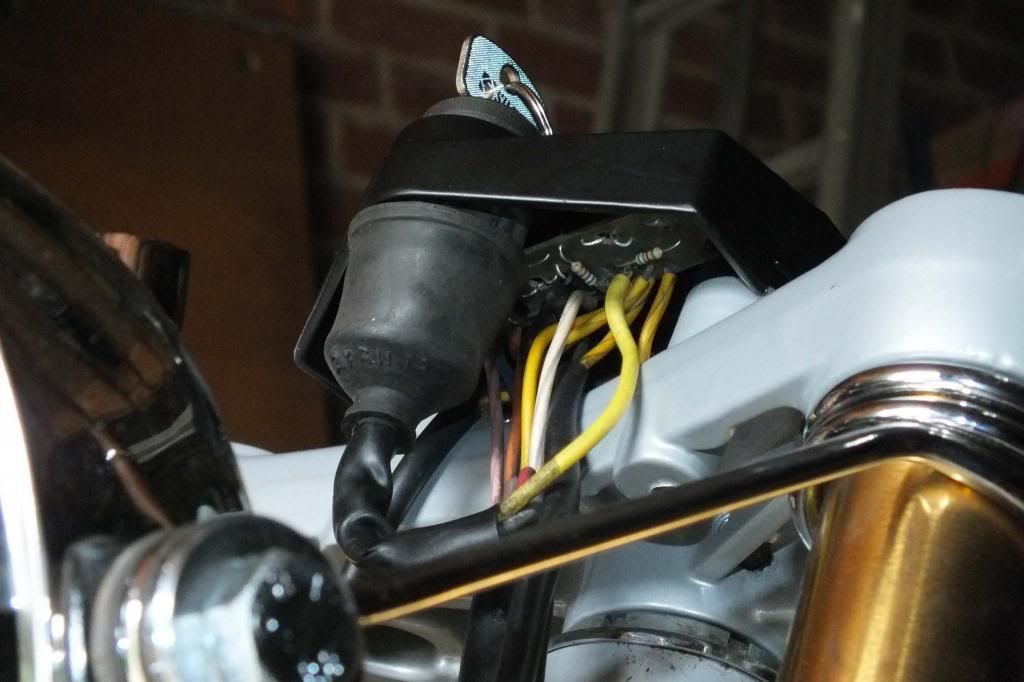
I hadn't quite completed the work on the dash - I had to replace the wire from the PCB to the ignition switch and also some of the wires to the ignition switch had damaged insulation. I have fixed this with clear heatshrink. I also replaced the yellow lighting wire from the ignition switch to the PCB...
DSCF1159.jpg


One of the nastier designs of the GTS is the use of a PCB track to carry the entire current for the lights from a pad on the PCB to the other lighting connections on the edge of the PCB. The unsurprising result being the track burning out; A previous owner had made a particularly disgusting repair. You can see it here, going from the far right hand LED to the top of the board...
DSCF1075.jpg


I stopped using the pad provided, instead drilling the PCB adjacent to where the other lighting loom wires join at the edge of the PCB. Kludge gone, looks like it has been there all along. here it is, all done...
DSCF1160.jpg

and installed...
DSCF1174.jpg


I will be adding a socking great 70A relay adjacent to the fusebox, the same mod I am carrying out on the SS. I think it should be pretty straightforward to add it such that no changes are made to the existing loom, only additions. Ignition, lights etc will be powered from this relay. I am going LED everywhere apart from the HID H4, which has it's own relay so the current draw will tumble; I plan to use the smallest Shorai I can lay my hands on. All good.

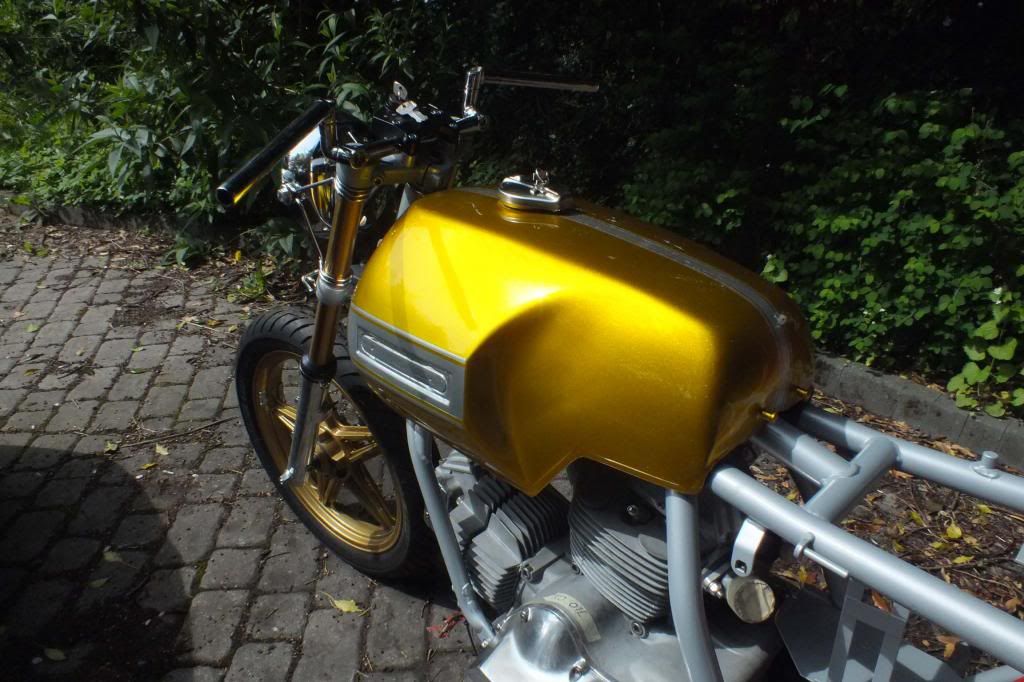
Got the paintwork home, slapped the tank straight on & waited for some sushine.

And Lo! The clouds parted!

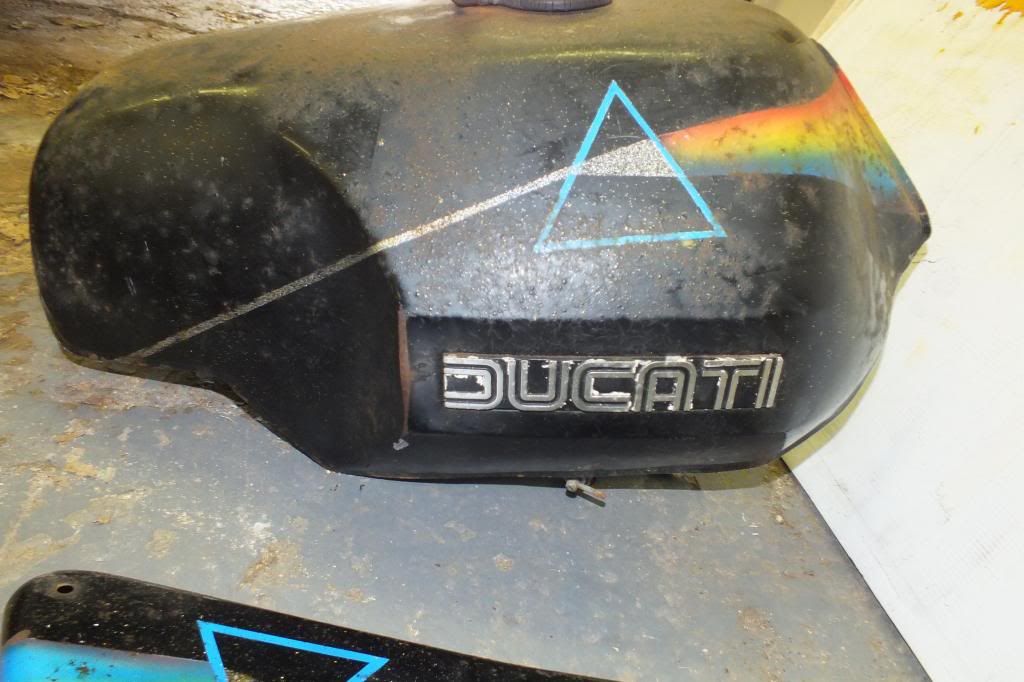
From this...
DSCF7385.jpg

and...
DSCF7381.jpg


To this and my, am I pleased the colour is entirely different from under fluorescent, richer, deeper and more lustrous under sunshine...
DSCF1167.jpg


DSCF1168.jpg

DSCF1171.jpg


DSCF1155.jpg


That fires me up! Unfortunately I have some waiting to do; However sorting out the wiring & mounting the electronic ignition, air filters etc., will keep me occupied whilst I await some powder coating for the rear mudguard (well, part of it) and the disc centres.

I might even get to fire it up in the next week or so; I had better start thinking about an MOT.

I almost forgot! I won't be able to change gear until I fix the gear lever.
 
Last edited:
Back
Top Bottom